API Preview
The API preview feature allows you to actually test content API requests on the management screen.
Information
The API preview does not support the Management API.
Preparation
Creating an API Key
When using the API preview, at least one API key with permissions for the called methods must be created.

For information on creating API keys and setting permissions, please refer to the following document.
API Key (API Authentication and Permission Management)
Granting Read Permissions for the API Key
When using the API preview, a role with read permissions for the API key is required.
For information on the settings, please refer to the following document.
Roles (Permission Management in the Admin Panel) > API Key
How to Use API Preview
1. Click the [API Preview] Button
Click the [API Preview] button on the content list screen or the content editing screen.

2. Specify the Method, Query Parameters, and Request Body
The API preview operation menu will be displayed, allowing you to specify the method, query parameters, and request body you want to preview.

3. Click [Retrieve]
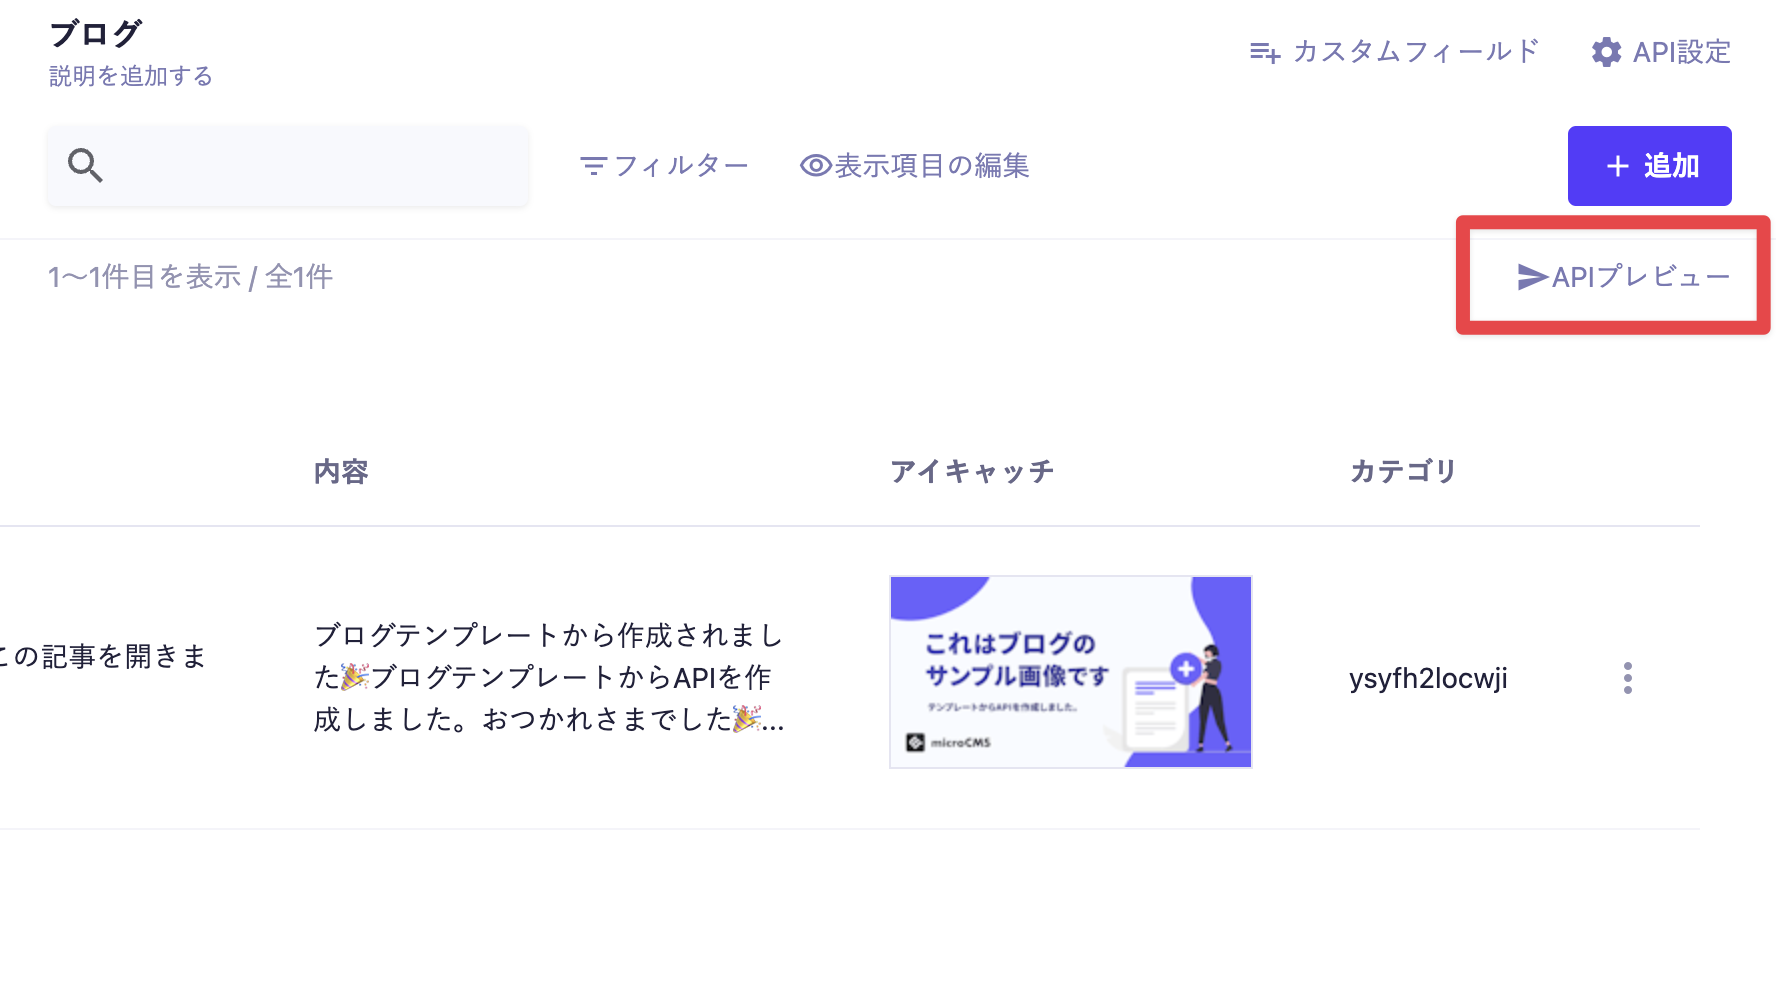
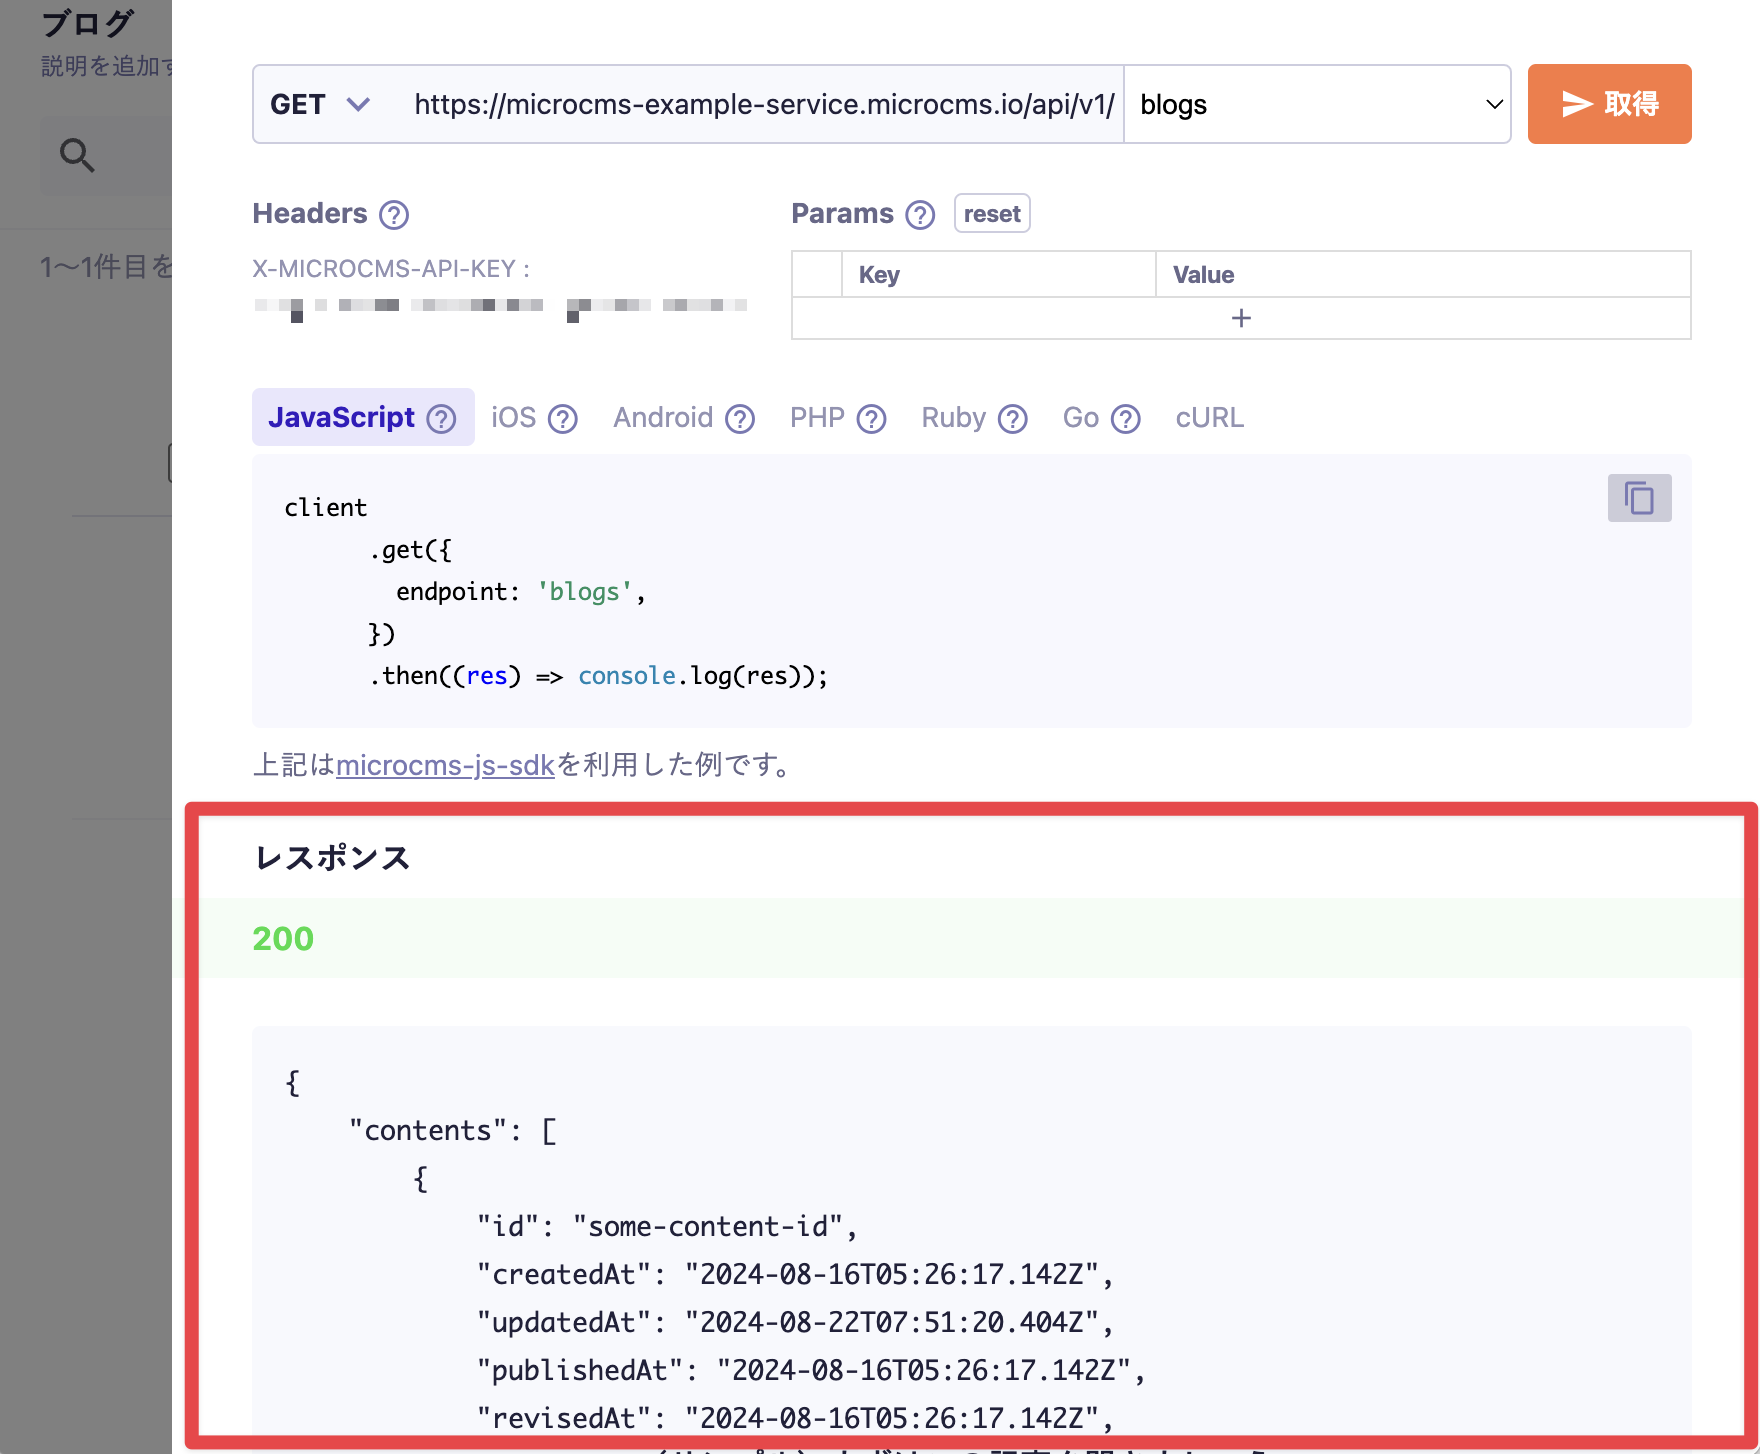
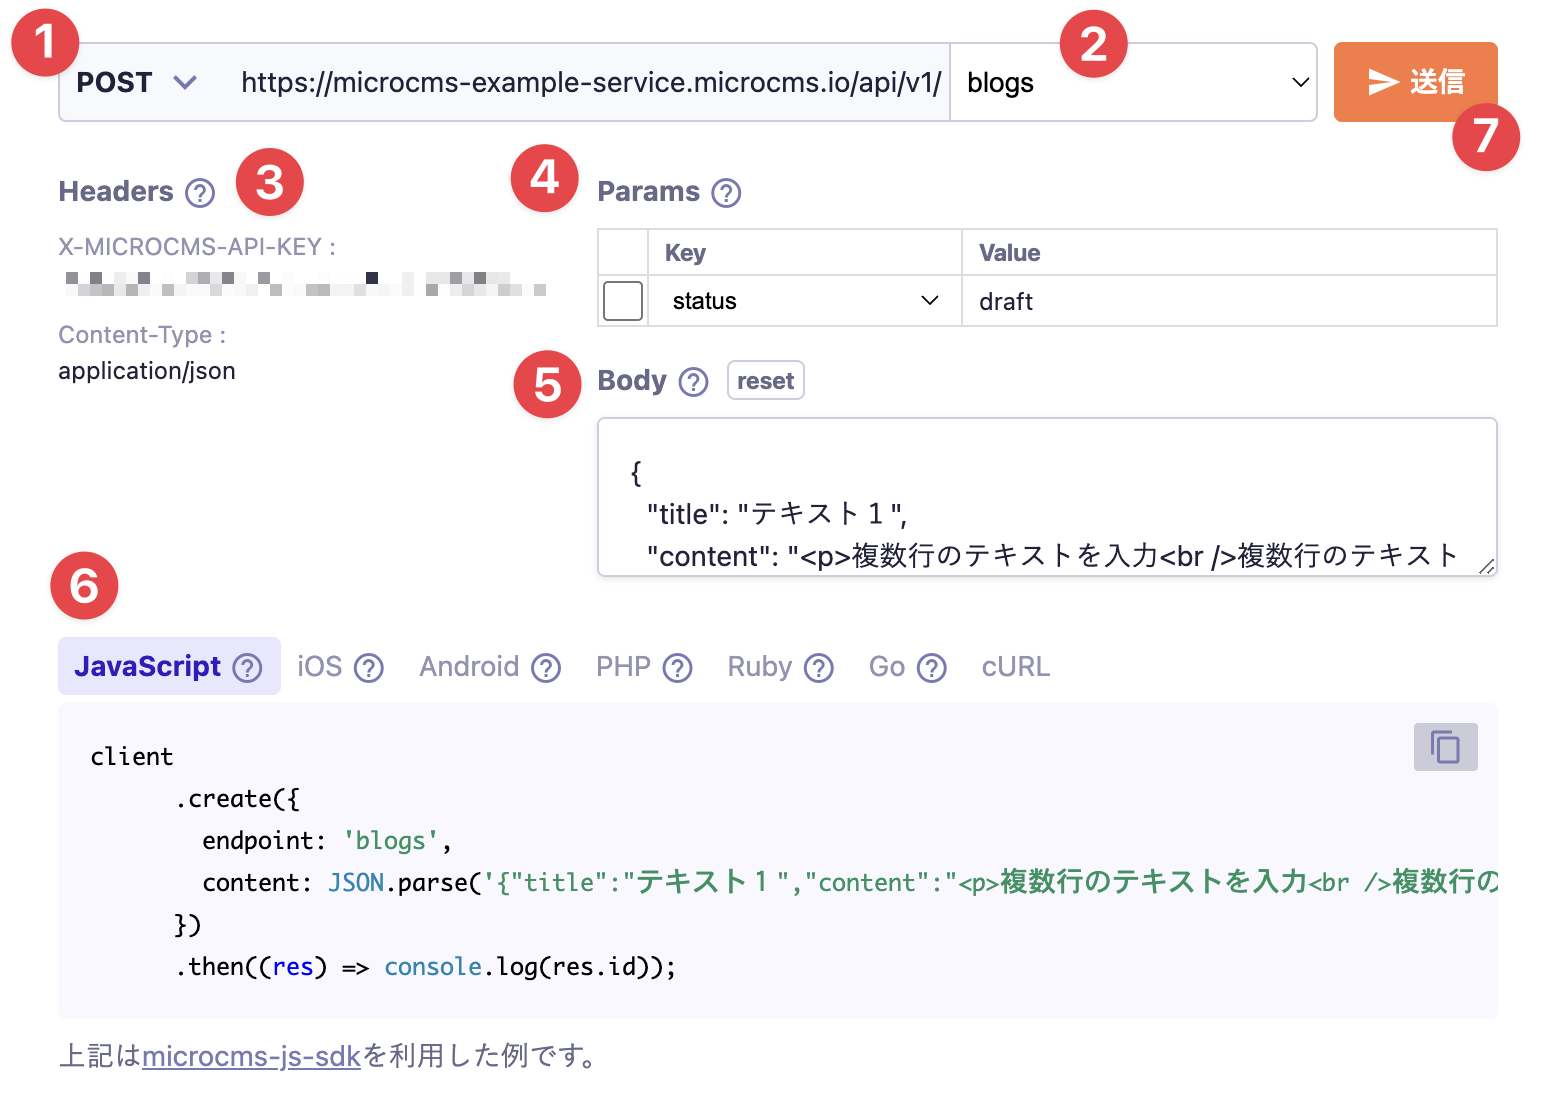
After specifying the request information, click the [Retrieve] (or [Send] for methods other than GET) button in the upper right corner.
This will display the response (status code, response body) according to the request content.

Caution
When using methods other than GET, executing the API preview will actually register or delete content. Please be very careful when using it in a production environment.
Description of the Operation Menu
This section explains the operation menu for the API preview.

1. Method
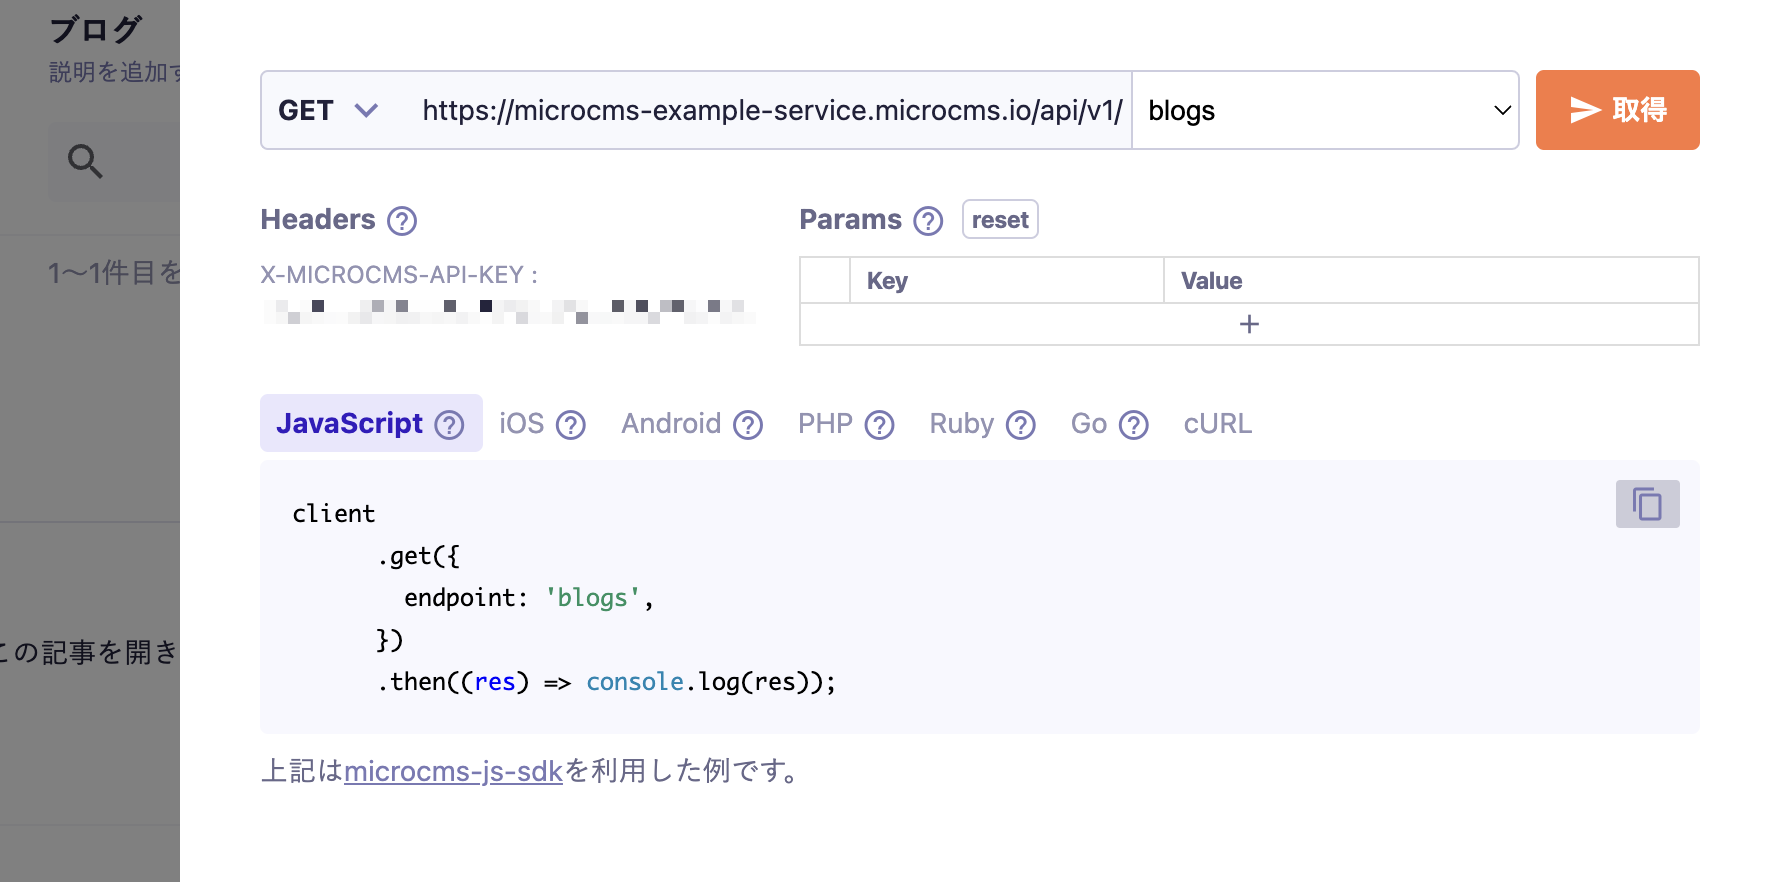
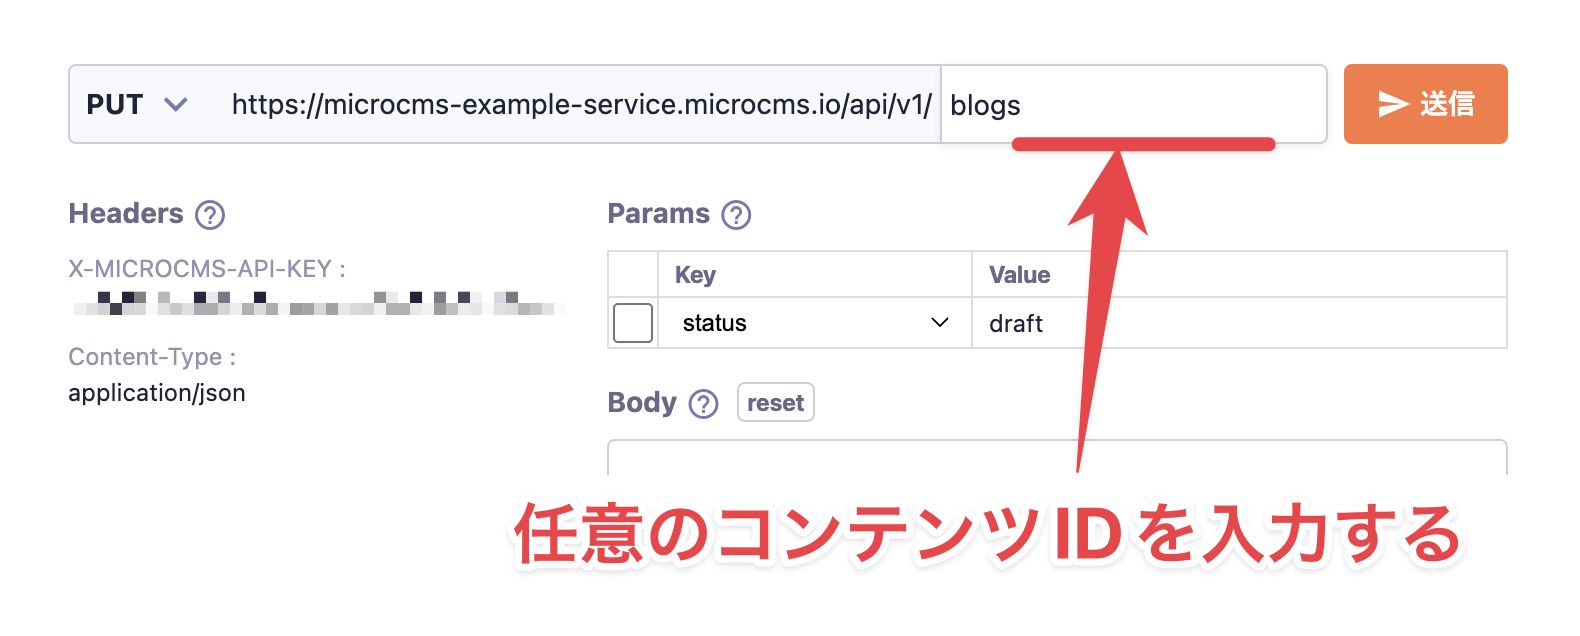
You can select the HTTP request method (GET/POST/PUT/PATCH/DELETE).
The available methods differ depending on whether you are in the content list screen or the content editing screen. Please refer to the descriptions for each method below for details.
2. Endpoint
You can select an endpoint from a dropdown menu or enter it freely.
* Free input is only available for the PUT method.
3. Request Headers
Some of the request headers that are added during the request are displayed. These cannot be changed within this operation menu.
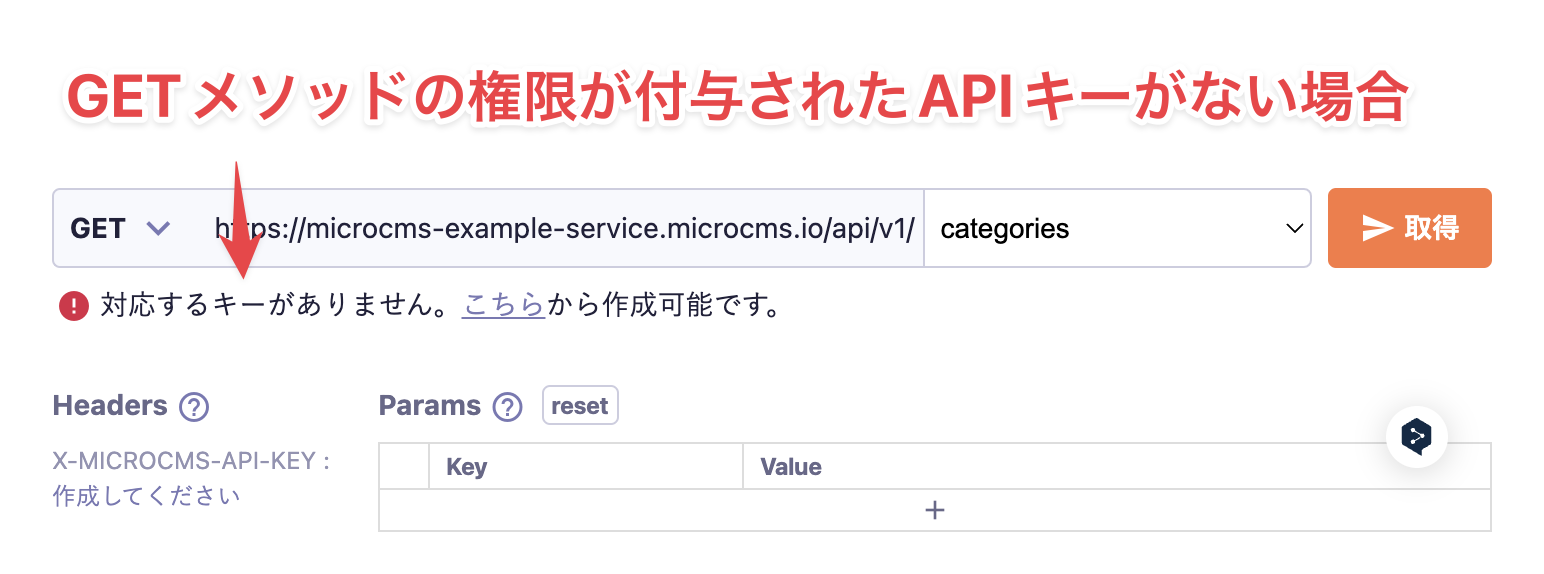
About X-MICROCMS-API-KEY
Among the API keys in the service, the one with permissions for the relevant method is automatically set. If there are no API keys that can be set, please create an API key with the necessary permissions.
If there are multiple API keys available, the set API key will be indeterminate.
4. Query Parameters
You can set the query parameters you want to add during the request.
For Key, you can only select valid values for each method. For Value, you can specify any value.
5. Request Body
You can specify any request body. Please enter it in JSON format.
Clicking the [reset] button will revert the input to its initial value.
6. Language Selection Menu
Based on the set query parameters and request body, you can check the notation methods for each programming language.
7. Send (Retrieve) Button
Clicking the send button (or the [Retrieve] button for the GET method) will actually send the request.
Below, we will explain how to use various methods of the Content API.
GET Method
Target Screens
- Content List Screen
- Content Edit Screen
Query Parameters (Params)
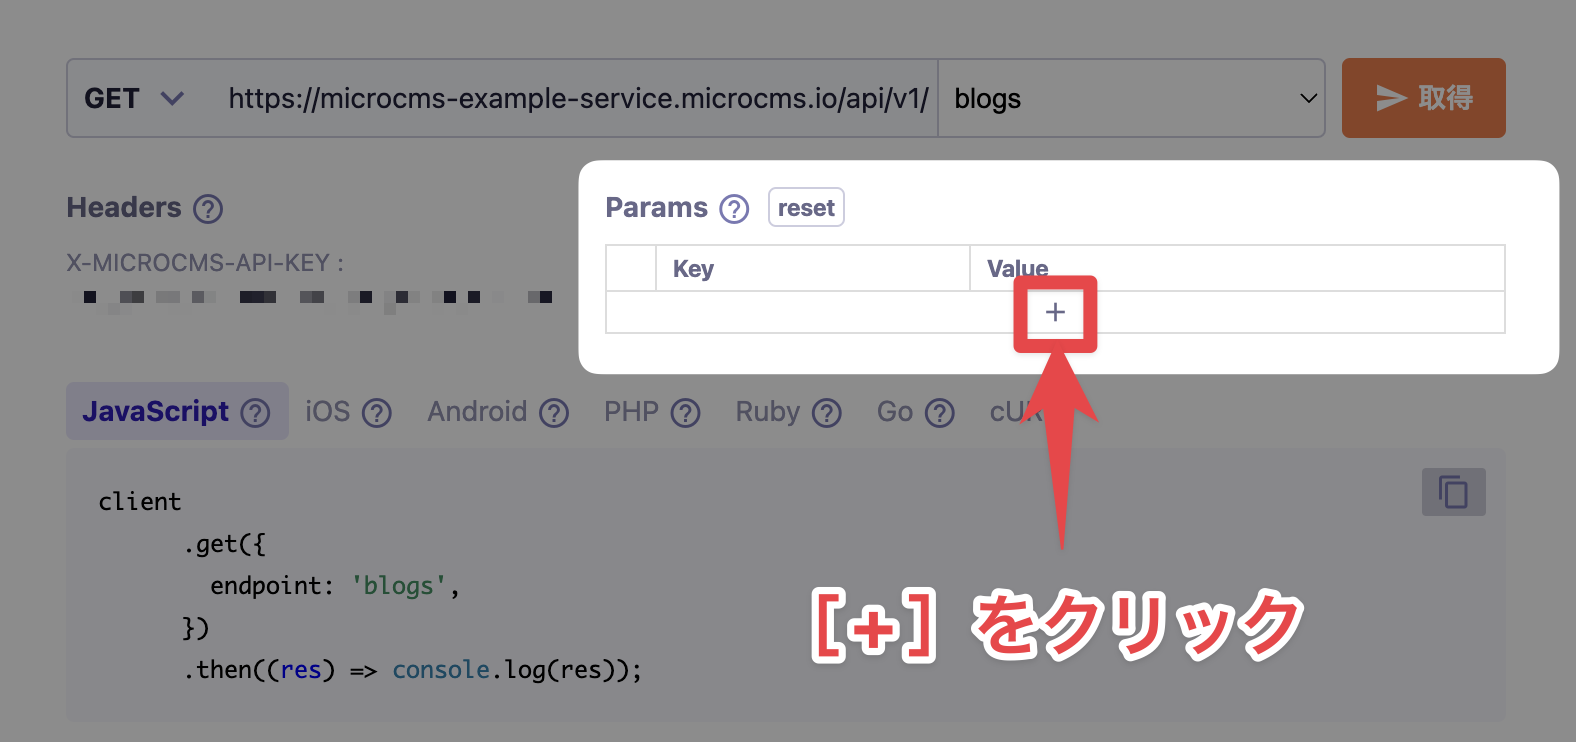
You can specify query parameters that can be used with the GET method.
Click the [+] button in the table of the "Params" section to add any query parameters you need.

For the query parameters that can be added, please refer to the following pages.
Response
The response will be returned according to the registered content. For more details, please refer to the following page.
GET /api/v1/{endpoint}
POST Method
Target Screen
- Content List Screen
Query Parameters (Params)
You can specify specific query parameters. For details on query parameters, please refer to the following page.
POST /api/v1/{endpoint}
Body (Request Body)
You can specify an optional request body. For details on the request body, please refer to the following page.
POST /api/v1/{endpoint}
Response
A response will be returned for the request. For details on the response, please refer to the following page.
POST /api/v1/{endpoint}
PUT Method
Target Screens
- Content List Screen
- Content Edit Screen
Endpoint
When registering content using the PUT method, you need to include the desired content ID in the endpoint.
For the Content List Screen
In the content list screen, only the API endpoint is entered. Please input the ID of the content you want to add after the /.

For the Content Edit Screen
In the content edit screen, the ID of the content currently being edited is already entered. Please change it to the desired content ID.
Query Parameters
You can specify certain query parameters. For details on query parameters, please refer to the following page.
PUT /api/v1/{endpoint}
Body (Request Body)
You can specify any request body. For details on the request body, please refer to the following page.
PUT /api/v1/{endpoint}
Response
A response will be returned for the request. For details on the response, please refer to the following page.
PUT /api/v1/{endpoint}
PATCH Method
Target Screen
- Content Editing Screen
Body (Request Body)
You can specify any request body. For details about the request body, please refer to the following page.
PATCH /api/v1/{endpoint}/{content_id}
Response
A response will be returned for the request. For details about the response, please refer to the following page.
PATCH /api/v1/{endpoint}/{content_id}
DELETE Method
Target Screen
- Content Editing Screen
Response
A response will be returned for the request. For details about the response, please refer to the following page.
DELETE /api/v1/{endpoint}/{content_id}
Caution
When executing an API preview with the DELETE method, an actual API request is sent and the content will be deleted. Please be cautious when using this feature.