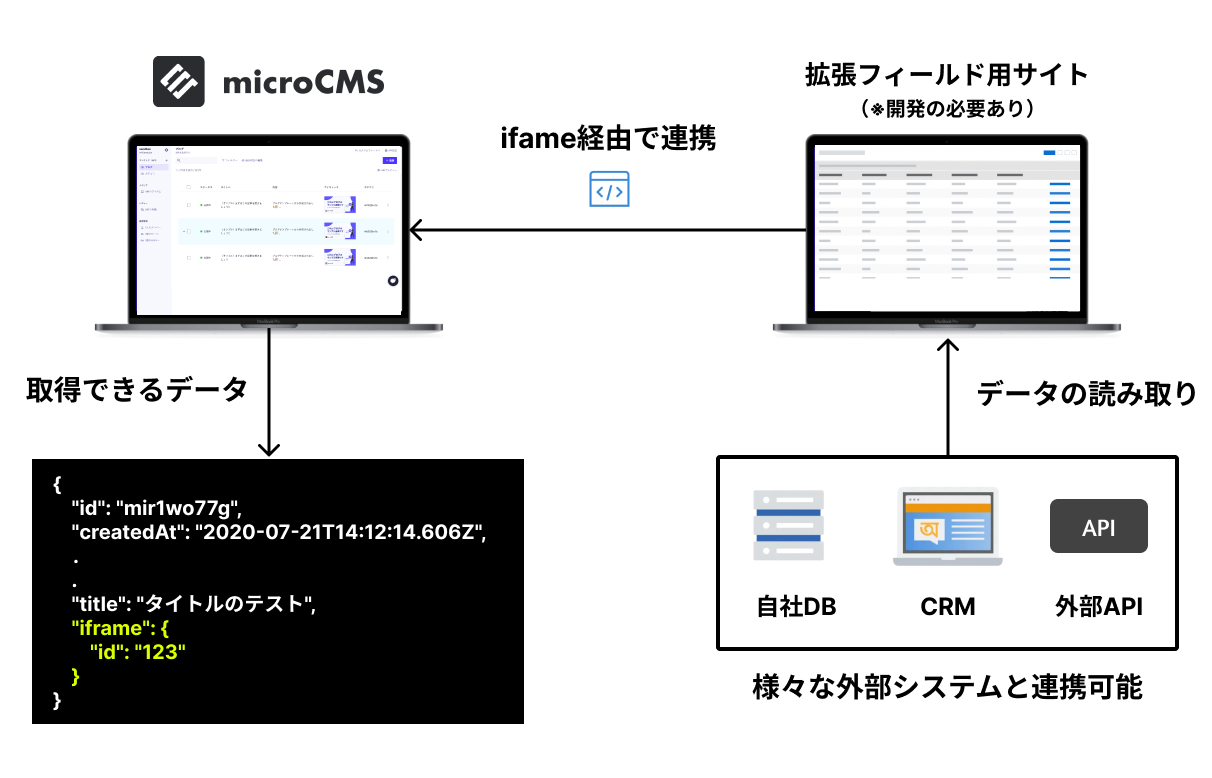
By using the extended fields, you can select external data within the management screen.
By loading applications developed independently as extended fields, it becomes possible to achieve flexible data management that is not available with the default fields.
The extended field utilizes an iframe as its internal mechanism. Below, we will introduce the detailed technical specifications and implementation methods.
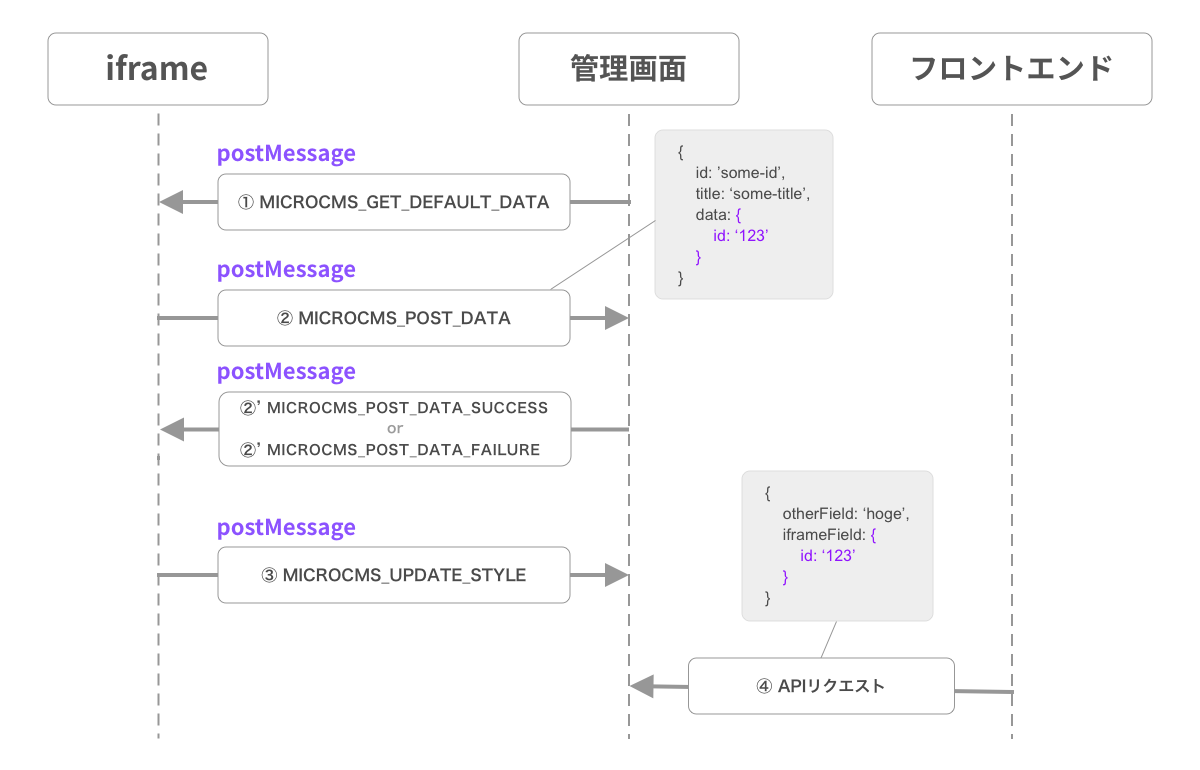
First, when you open the content creation/editing screen where the extended field is set, the microCMS management screen sends a postMessage to the iframe as follows.
{
id: 'some-id', // iframe identifieraction: 'MICROCMS_GET_DEFAULT_DATA',
message: {
data: 'Registering data in the iframe'// Actual data for the extended field
},
user: {
email: 'example@microcms.co.jp'// Logged-in user's email address
},
context: {
type: 'new_content', // 'new_content' for new content creation, 'edit_content' for editingendpoint: 'some-api', // Content API endpoint namecontent: {
id: null// null for new content creation, actual content ID for editing
}
}
}
The iframe side can receive the above message by setting an EventListener for the message event. id should be stored somewhere as it will be used during transmission. message value will be used as the initial value. (Initially, it is undefined) user.email contains the logged-in user's email address.
window.addEventListener('message', (e) => {
if (
e.isTrusted === true &&
e.data.action === 'MICROCMS_GET_DEFAULT_DATA'
) {
// Save id and message// e.data.id: Identifier// e.data.message: Configured value// e.data.user.email: Logged-in user's email address information// e.data.context.endpoint: API endpoint name
}
});
Conversely, if you want to POST some data from the iframe to the microCMS management screen, you can do so by sending a postMessage as follows.
window.parent.postMessage(
  {
    id: 'some-id',  // iframe identifier
    action: 'MICROCMS_POST_DATA',
    message: {
      id: 'some-id',
      title: 'some-title',
      description: 'some-description',
      imageUrl: 'some-image-url',
      updatedAt: 'some-updated-at',
      data: {    // Part that will be the API response
        id: '123'
      }
    }
  },
  'https://your-service-id.microcms.io'
);
id should be specified as the id received from microCMS during screen loading. action should be specified as 'MICROCMS_POST_DATA'. message contains the following metadata items.
id (String)
title (String)
description (String)
imageUrl (String: URL format)
updatedAt (Date)
All of these are optional items and are values set for easier management within the microCMS management screen. If set, they will be displayed in the content list screen, etc.
Additionally, there is a data field for the API response.
data (Type varies)
The value specified in data will be returned as the value for the iframe field from the content GET API.
To ensure secure communication, specify the URL of the microCMS management screen as the second argument of postMessage.
While there is no response for postMessage, a pseudo-response is returned to indicate whether the data change was successful. Upon success, you can receive a postMessage like the following.
{
id: 'some-id', // iframe identifieraction: 'MICROCMS_POST_DATA_SUCCESS',
message: value // Sent value
}
In case of failure, a postMessage like the following will be returned.
The height of the iframe is determined at the initial load, so it may become difficult to see when the UI inside the iframe changes. Therefore, by sending a postMessage as follows from the iframe, you can change the height and width of the iframe itself.
The conditions that can be applied for the filters query parameter vary depending on the type of metadata. For details, please refer to the Specification of Query Parameters in GET API.
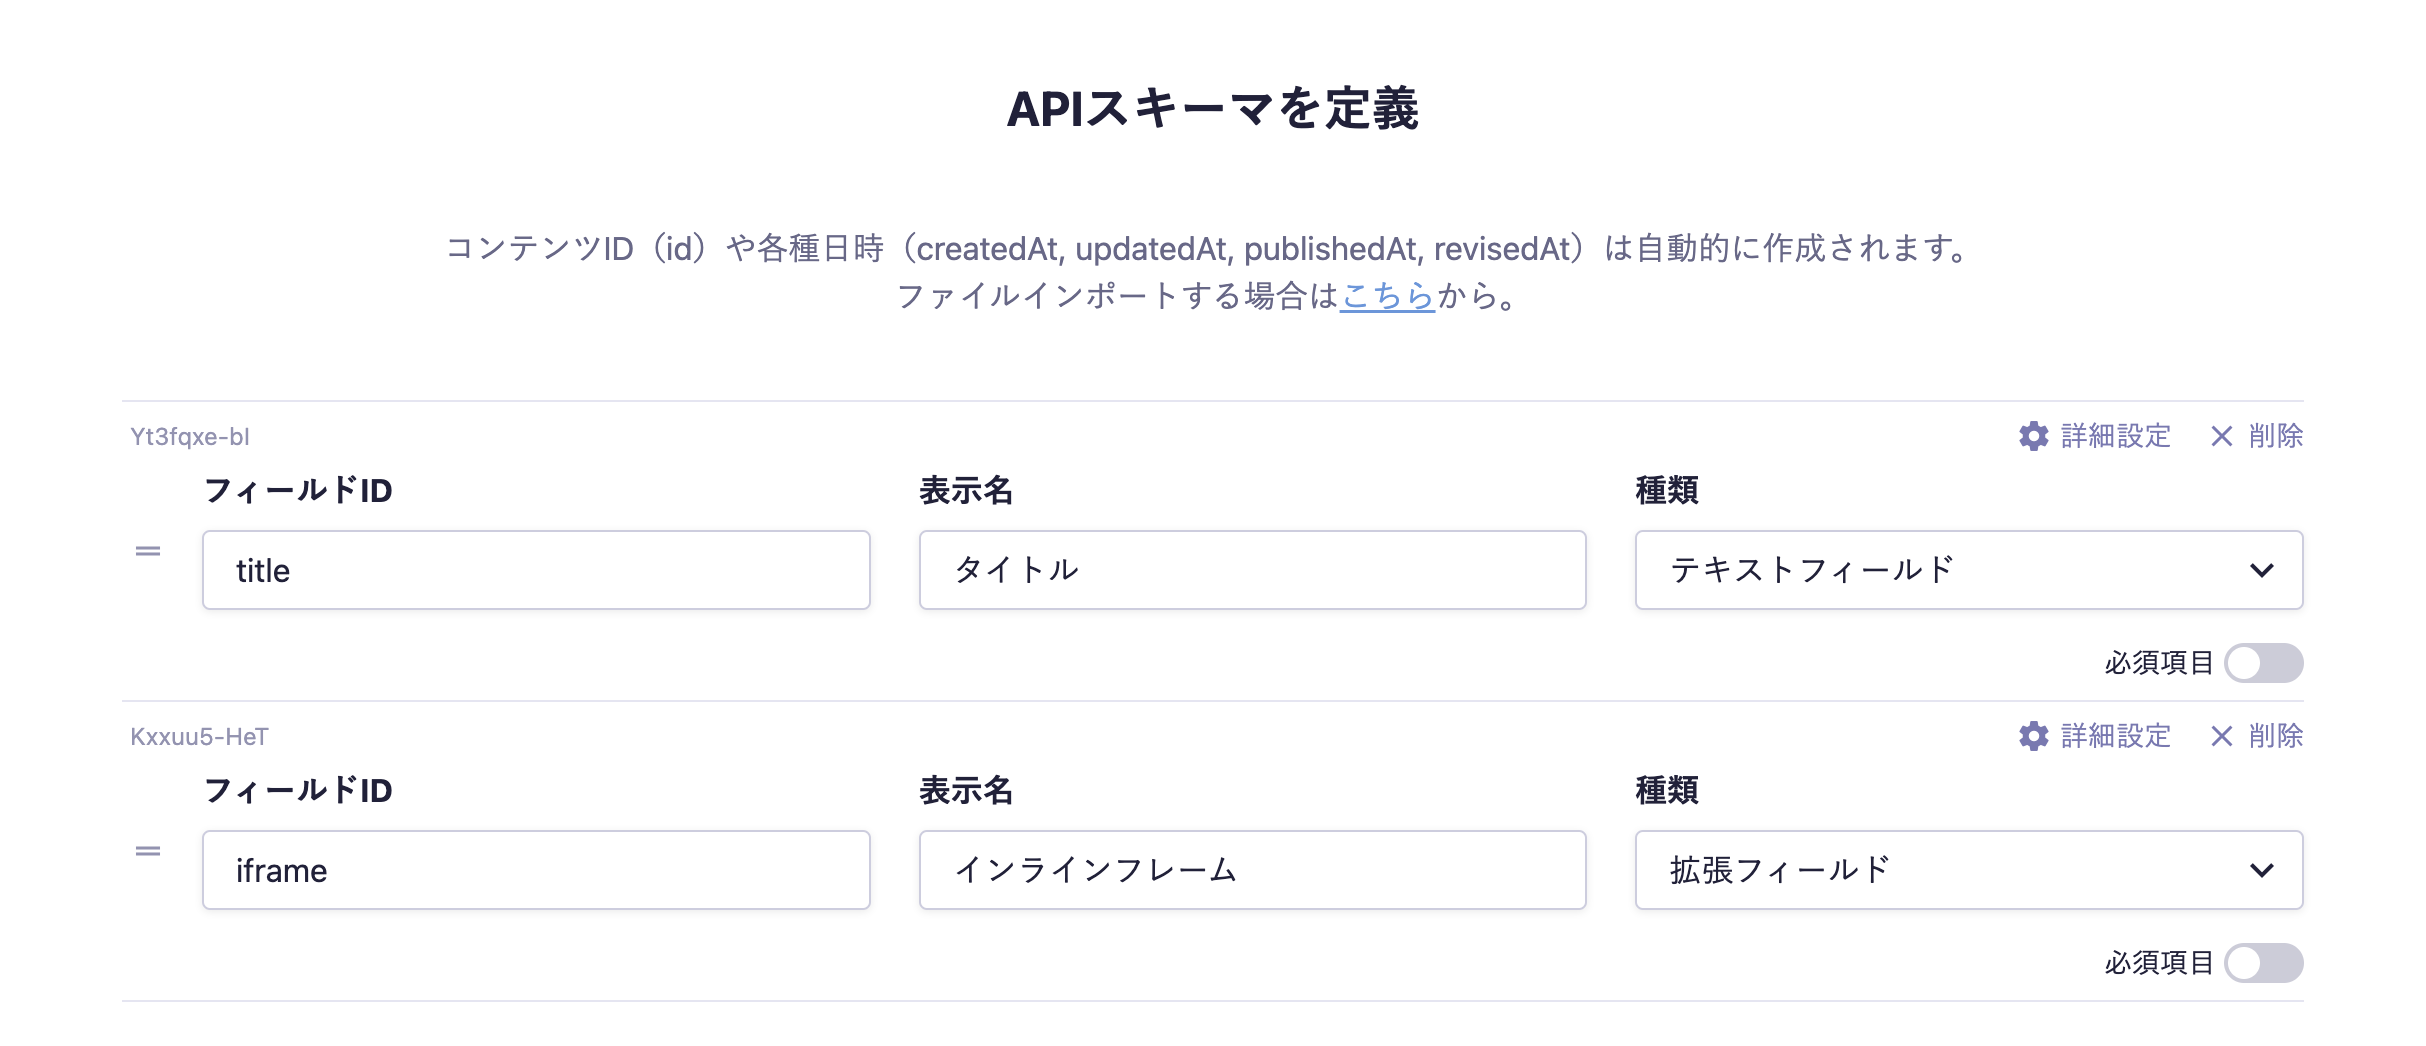
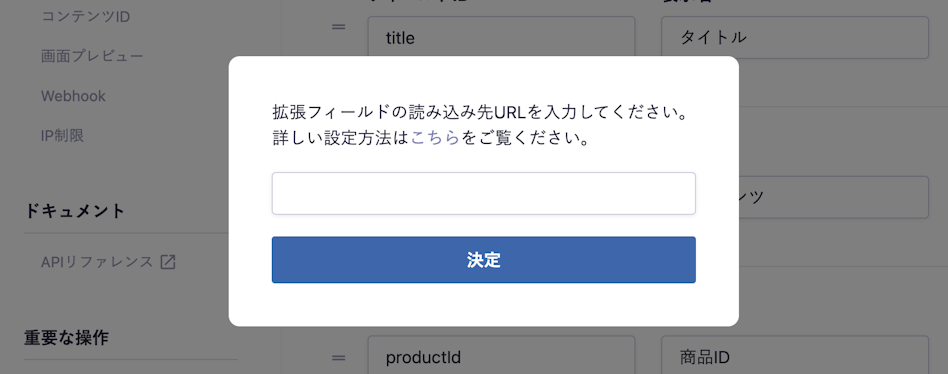
Select "Extended Field" from the API settings > API Schema Type.
Enter the URL you want to load in the extended field. localhost can also be specified.
The field configuration is now complete. When you navigate to the content editing screen, the URL you specified earlier will be displayed via an iframe.
In the detailed settings for extended fields, the following items can be configured.
Setting Item
Description
Required Field
When enabled, input is required during submission.
Description Text
This is the description text displayed on the submission screen.
Extended Field URL
Enter the URL to load.
Information
Regarding the mandatory field check for the input content of the extended fields, the input content varies depending on the application being loaded, so it is designed in such a way that checks cannot be performed based on the same criteria as normal fields. (Specifically, once data is sent from the iframe side, it is recognized as filled in thereafter.)
If strict checks are required, we kindly ask that you implement validation checks on the application side that is being loaded.
This is an SDK that allows you to implement extended fields without worrying about the specifications of iframes. The microcms-field-extension at the following URL is a repository that manages multiple libraries. We provide various libraries and templates.
microcms-field-extension is recommended for new use and follows a maintenance policy of continuous feature improvement and support (Active). For the maintenance policy of the SDK, please refer to the "SDK Maintenance Policy" page in the "Limitations / Notes" section.
There are templates available for create-react-app and Next.js, among others. You can easily set up the implementation environment for extended fields by running commands with npx. For example, you can set up the environment for Next.js by simply executing the following command.
npx create-next-app my-app --example https://github.com/microcmsio/microcms-field-extension-sdk/tree/main/examples/nextjs
cd my-app
export NEXT_PUBLIC_MICROCMS_ORIGIN='https://example.microcms.io'
npm run dev
Additionally, more examples are planned to be added.

.png)