Tutorial
In this tutorial, we will create a news app for iOS using microCMS and the iOS SDK.
During the process, we will cover:
- Fetching and displaying lists
- Fetching and displaying repeated content
If you haven't completed the SDK setup yet, please refer to "Getting Started" for the setup instructions.
First, here is the screen we will create.

Two articles are listed. Tapping on each item will navigate to the detail screen.

The news content that can be read on the detail screen consists of a "headline," "text," and "image."
Creating an iOS App
Creating a List Screen
First, we will create a class called Article to represent news articles.
struct Article {
let id: String
let title: String
let contents: [ArticleContent]
let imageUrl: URL
let publishedAt: Date
init(id: String, title: String, body: [ArticleContent], imageUrl: URL, publishedAt: Date) {
self.id = id
self.title = title
self.contents = body
self.imageUrl = imageUrl
self.publishedAt = publishedAt
}
init(object: [String: Any]) {
self.id = object["id"] as! String
self.title = object["title"] as! String
let imageObject = object["image"] as! [String: Any]
self.imageUrl = URL(string: imageObject["url"] as! String)!
let formatter = ISO8601DateFormatter()
formatter.formatOptions.insert(.withFractionalSeconds)
let publishedAt = formatter.date(from: object["publishedAt"] as! String)
self.publishedAt = publishedAt!
}
}This class defines the properties that a news article has, along with an initializer to create an instance from a JSON object.
Next, we will retrieve the list of news articles. Create a file named MicrocmsService.swift and write the following content.
import Foundation
import MicrocmsSDK
class MicrocsmService: ObservableObject {
@Published var articles: [Article] = []
func request() {
let client = MicrocmsClient(
serviceDomain: "SERVICE_DOMAIN",
apiKey: "YOUR_API_KEY")
client.get(endpoint: "trends") { result in
switch result {
case .success(let object):
if let object = object as? [String: Any],
let contents = object["contents"] as? [[String: Any]] {
self.articles = contents.map { Article(object: $0) }
}
case .failure(let error):
print("[ERROR] \(error)")
}
}
}
}When you execute request(), the list of news articles will be retrieved from microCMS and stored as Article instances.
You can create the news list screen using the MicrocmsService as follows.
import SwiftUI
struct ContentView: View {
@ObservedObject var service = MicrocsmService()
var body: some View {
NavigationView {
List {
ForEach(0..<service.articles.count, id: \.self) { index in
ArticleListRow(article: service.articles[index])
}
}.navigationTitle("All Articles")
}
.onAppear {
service.request()
}
}
}ArticleListRow.swift
import SwiftUI
struct ArticleListRow: View {
var article: Article
var dateFormatter: DateFormatter = {
let d = DateFormatter()
d.dateFormat = "yyyy/MM/dd"
return d
}()
var body: some View {
HStack {
NetworkImage(url: article.imageUrl)
.frame(width: 136, height: 96)
.cornerRadius(4)
Spacer(minLength: 8)
VStack(alignment: HorizontalAlignment.leading) {
Text(article.title)
.font(.headline)
.padding(.bottom, 4)
Text(dateFormatter.string(from: article.publishedAt))
.font(.caption)
}
Spacer()
}
.padding(4)
}
}
When the screen is displayed, it fetches the news articles and displays them in the list view.
Once you have written this, try running the app. You should see a screen like the one below.

Creating a Project (Part 2)
Now that we have the news list screen, the next step is to create the news detail screen.
In the news detail screen, we will utilize microCMS's "Repeating Content".
- Content submission using repeating fields
- Make it easy to replicate by simply exporting and importing the settings
Creating an iOS App
Creating the Detail Screen
First, we will extend the Article model we created earlier.
In the detail screen's repeating content, elements such as "heading," "body," and "image" will appear repeatedly.
Therefore, we will prepare a protocol called ArticleContent and define the elements in accordance with it.
import Foundation
protocol ArticleContent {}
struct HeadingContent: ArticleContent {
let content: String
}
struct TextContent: ArticleContent {
let content: String
}
struct ImageContent: ArticleContent {
let imageUrl: URL
}
Next, we will add a property called contents to the Article. This array will contain elements of HeadingContent, TextContent, and ImageContent.
We will parse the information based on the fieldId information.
struct Article {
let id: String
let title: String
let imageUrl: URL
let publishedAt: Date
let contents: [ArticleContent]
init(object: [String: Any]) {
self.id = object["id"] as! String
self.title = object["title"] as! String
let imageObject = object["image"] as! [String: Any]
self.imageUrl = URL(string: imageObject["url"] as! String)!
let formatter = ISO8601DateFormatter()
formatter.formatOptions.insert(.withFractionalSeconds)
let publishedAt = formatter.date(from: object["publishedAt"] as! String)
self.publishedAt = publishedAt!
// Parse repeating content
let rawContents = object["body"] as! [Dictionary<String, Any>]
let contents = rawContents.map { content -> ArticleContent in
let fieldId = content["fieldId"] as! String
switch fieldId {
case "text":
return TextContent(content: content["content"] as! String)
case "heading":
return HeadingContent(content: content["content"] as! String)
case "image":
let imageObject = content["image"] as! [String: Any]
let imageUrlString = imageObject["url"] as! String
return ImageContent(imageUrl: URL(string: imageUrlString)!)
default:
return TextContent(content: "")
}
}
self.contents = contents
}
}
We have now extended the model.
Next, let's create the transition to the detail screen.
First, we will create the detail screen, which we will name ArticleDetail.
import SwiftUI
struct ArticleDetail: View {
let article: Article
var body: some View {
ScrollView(.vertical) {
VStack(alignment: .leading) {
ForEach(0..<article.contents.count, id: \.self) { num in
let content = article.contents[num]
if let heading = content as? HeadingContent {
Text(heading.content)
.font(.title3)
} else if let text = content as? TextContent {
Text(text.content)
.font(.body)
} else if let image = content as? ImageContent {
NetworkImage(url: image.imageUrl)
.frame(height: 200)
.cornerRadius(8)
.padding(.bottom, 20)
}
}
.padding(8)
}
.padding(12)
.navigationBarTitle(article.title, displayMode: .inline)
}
}
}We are placing elements while looking at the contents we parsed earlier.
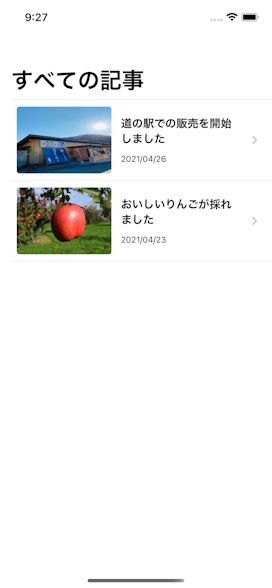
Now, let's implement the transition from the list screen to the detail screen. This can be easily implemented using NavigationLink.
struct ContentView: View {
@ObservedObject var service = MicrocsmService()
var body: some View {
NavigationView {
List {
ForEach(0..<service.articles.count, id: \.self) { index in
// Add here
NavigationLink(destination: ArticleDetail(article: service.articles[index])) {
ArticleListRow(article: service.articles[index])
}
}
}.navigationTitle("All Articles")
}
.onAppear {
service.request()
}
}
}
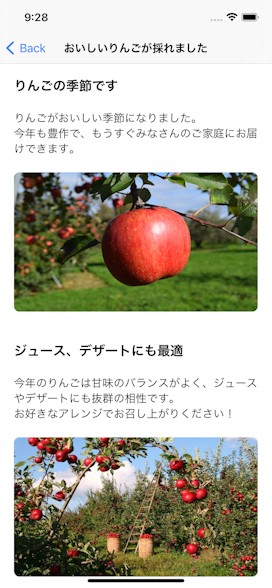
Now we have created the detail screen. Let's run the app and check it.

If this screen is displayed, it is a success. The heading, body, and image are displayed repeatedly.
Let's modify the data submitted via microCMS and confirm that it reflects in the app.
