microCMS

Getting Started

This document outlines the shortest steps to use microCMS with Gatsby.
If you are using microCMS from Gatsby for the first time, please try these steps first.

Things to Confirm in Advance

  • You will need Node.js and npm to develop with Gatsby. Please install them in your development environment.
  • You must have completed the creation of the microCMS service. If you haven't done this, please refer to the document below.

Setting Up microCMS

First, let's create a simple API with microCMS.

  • Object format
  • One text field

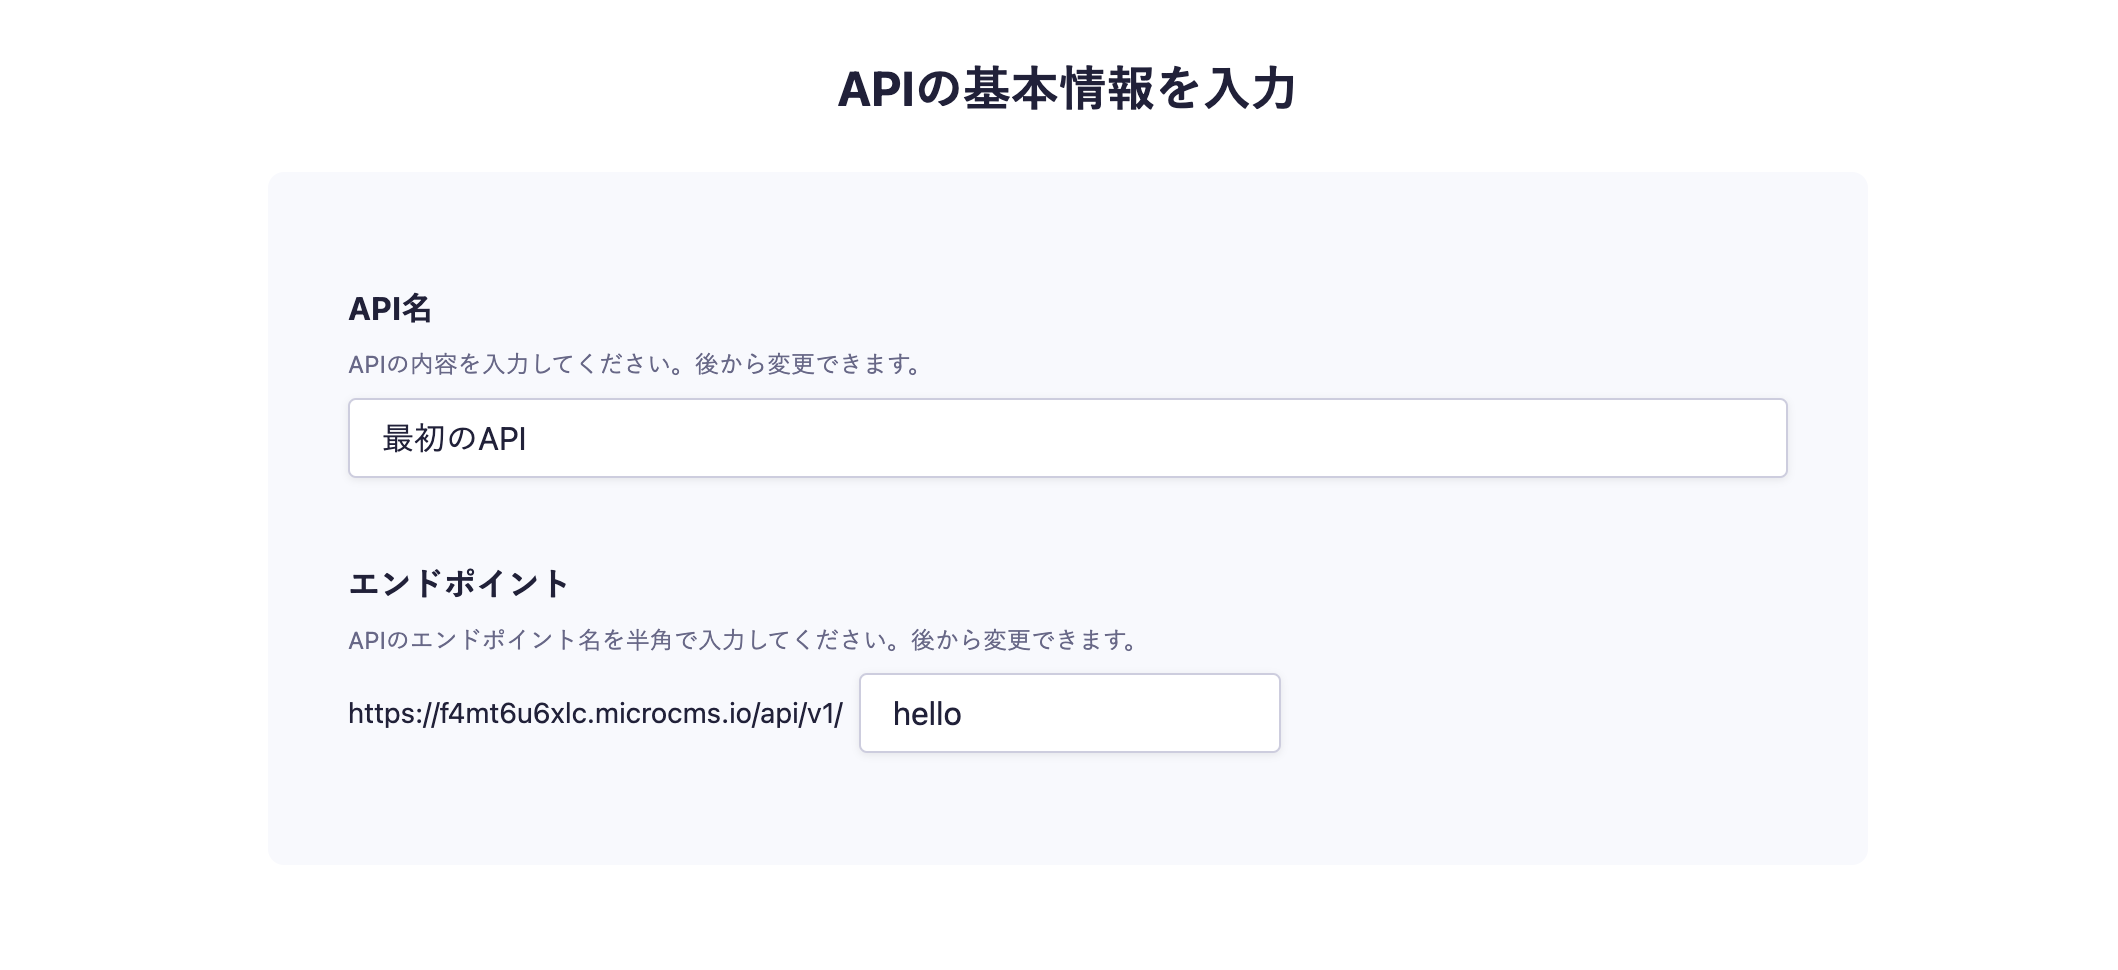
In the API creation screen, enter the desired API name and endpoint.


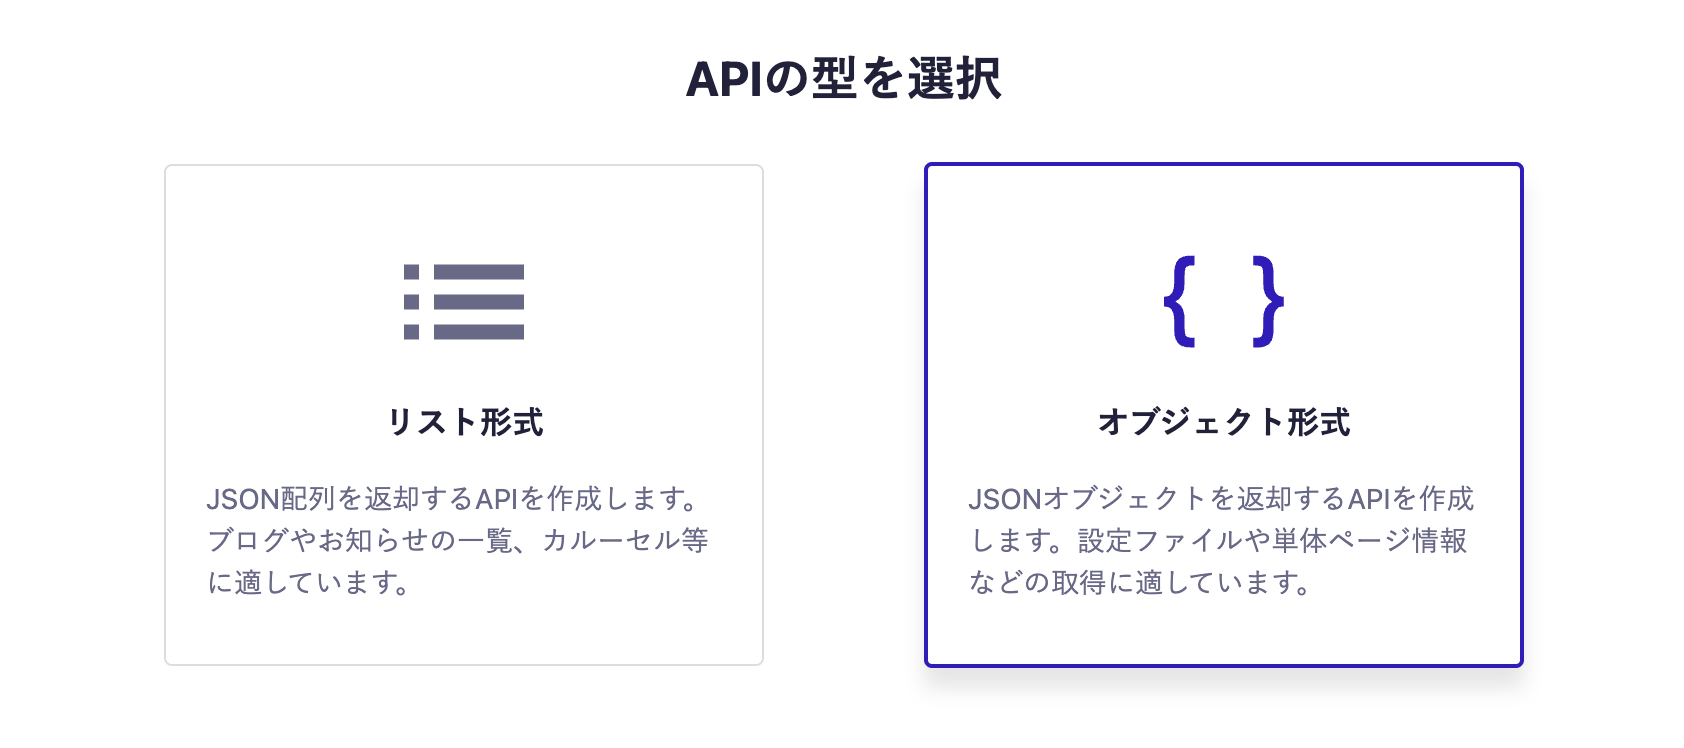
Next, select the object format.


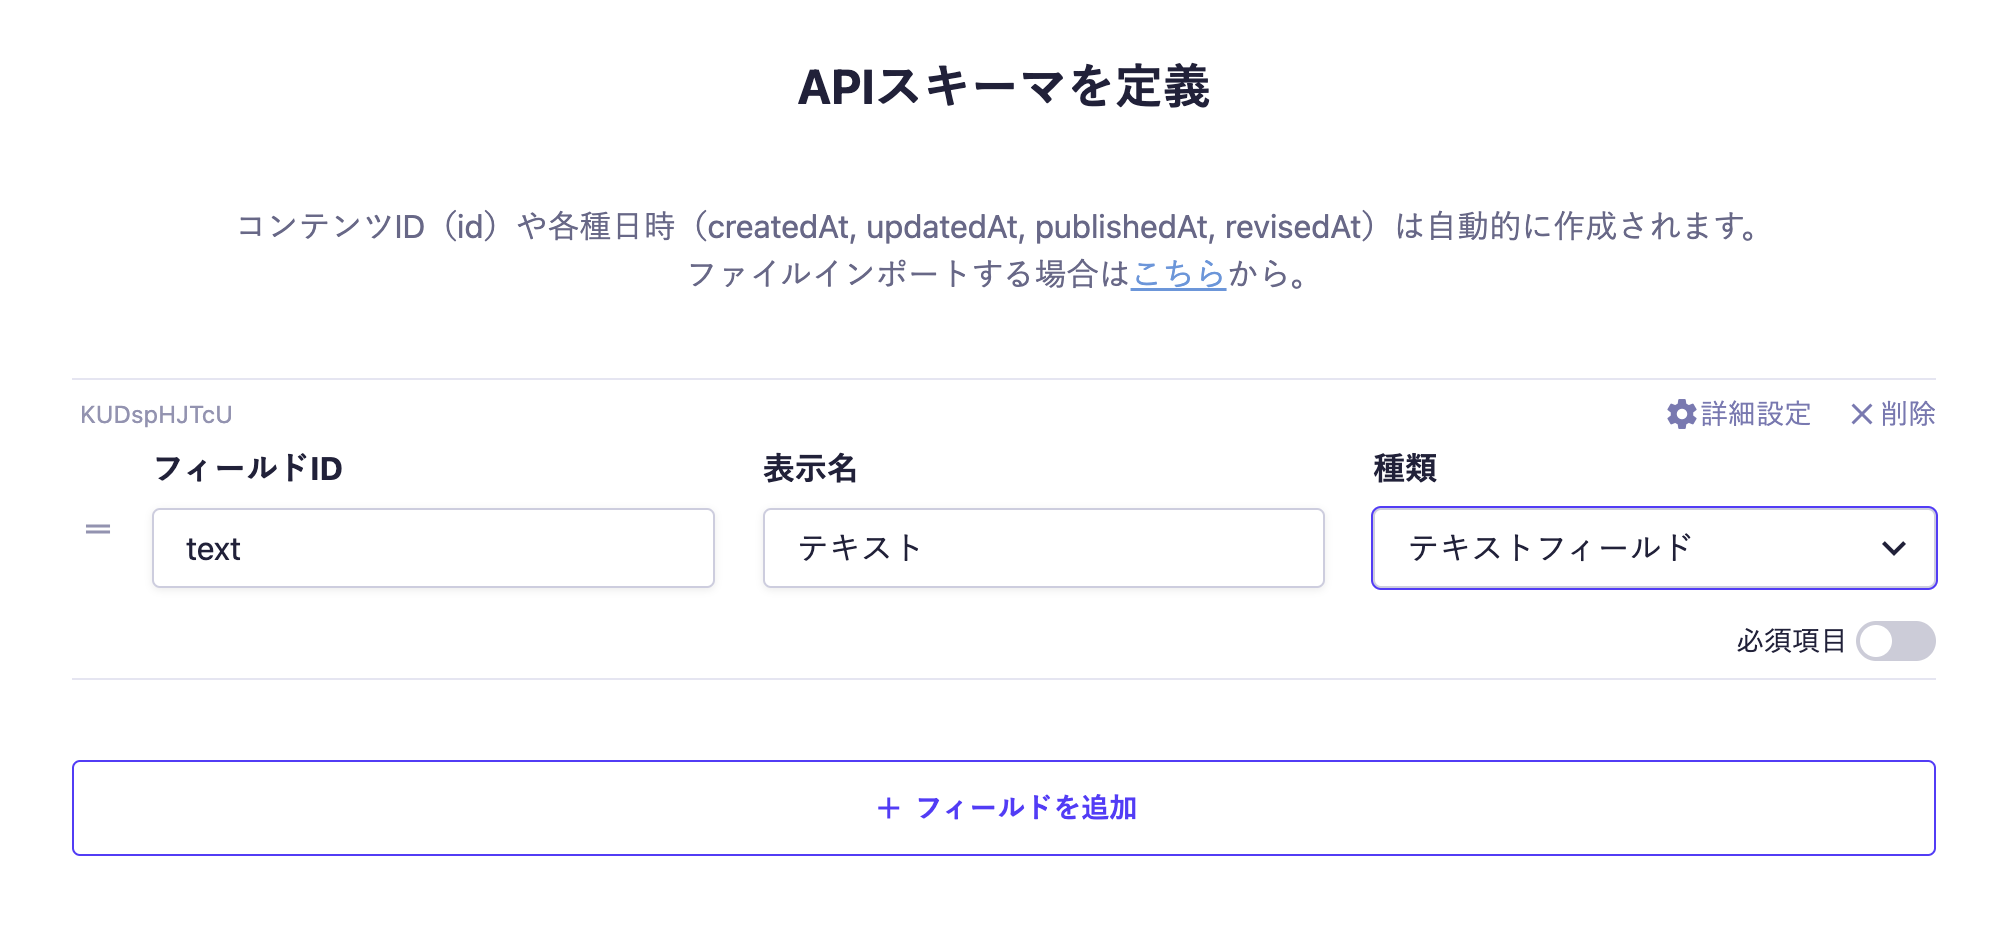
Finally, set the fields. This time, we will set only one text field.


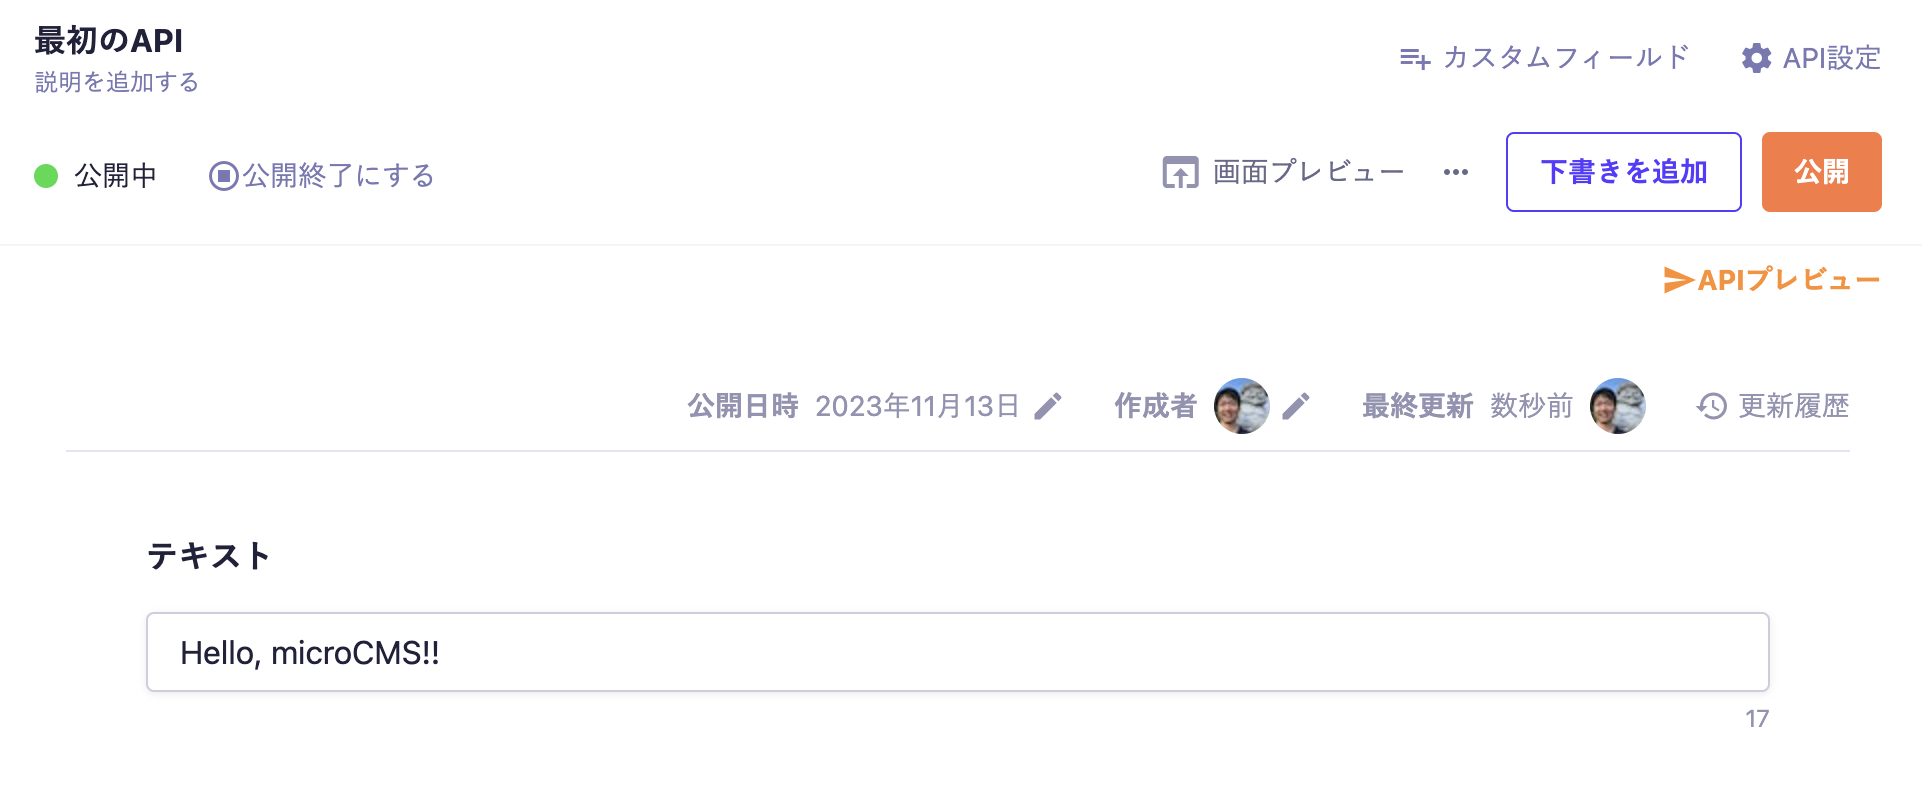
Once the API is created with the above settings, it will be ready to accept content submissions.
Move to the editing screen, enter the desired values, and publish.


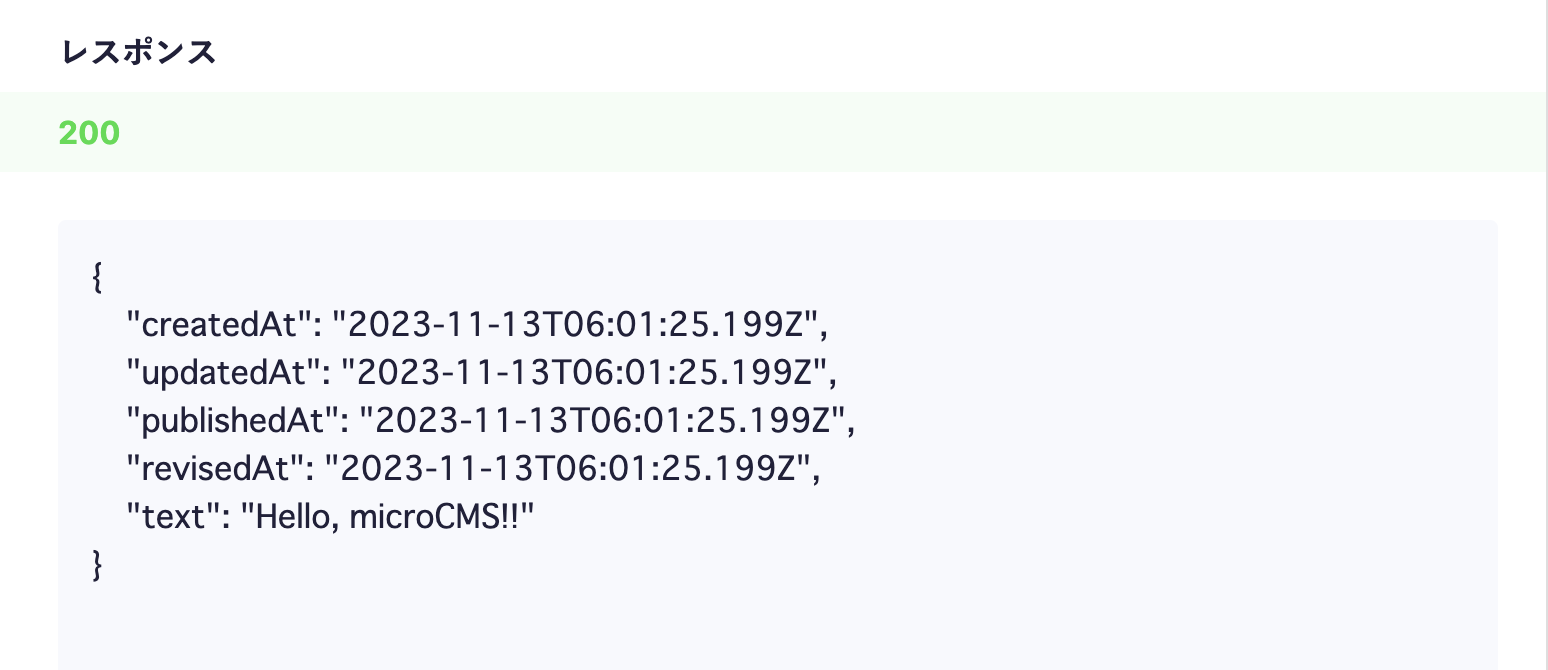
At this point, a response containing content data will be returned from the API.
Click on the API preview in the upper right corner to access the created API and confirm that a JSON response is being returned.


Preparing the Gatsby Project

Next, create a Gatsby project using the official CLI provided by Gatsby. Let's run the following command.

npx gatsby new gatsby-microcms

Once the project creation is complete, let's start the development server using the develop command.

cd gatsby-microcms
npm run develop

Then, access http://localhost:8000. If the creation was successful, a screen like the one below will appear in the browser.

Integrating microCMS

Next, we will implement the process to fetch information from the microCMS API created earlier and display it on the screen.
To fetch data in Gatsby, install gatsby-source-microcms.

npm install gatsby-source-microcms

Next, add the configuration to retrieve data from microCMS in gatsby-config.js. You can find the API_KEY in the service settings > API-KEY. Please set serviceId to the one you configured. Since we are using an object format this time, specify format as object.

module.exports = {
  plugins: [
    {
      resolve: 'gatsby-source-microcms',
      options: {
        apiKey: 'API_KEY',
        serviceId: 'example',
        apis: [{
          endpoint: 'hello',
          format: 'object',
        }],
      },
    },
  ],
};

Now, let's create hello.js inside src/pages.

// hello.js
import * as React from "react"
import { graphql } from "gatsby"
import Layout from "../components/layout"
import SEO from "../components/seo"

const Hello = ({ data: { microcmsHello } }) => (
  <Layout>
    <SEO title="Hello, microCMS!!" />
    <h1>{microcmsHello.text}</h1>
  </Layout>
)

export default Hello

export const query = graphql`
  query {
    microcmsHello {
      text
    }
  }
`

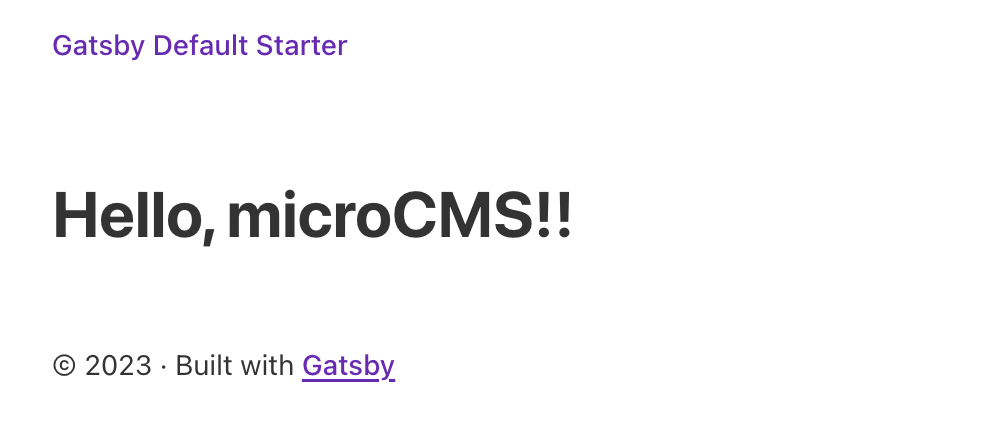
Here, we are using a GraphQL query to fetch the data. You can retrieve the data you submitted earlier with microcmsHello.text.
Access http://localhost:8000/hello to see the result.


By changing the content submitted in microCMS and running npm run develop again, you can also confirm that the displayed content changes.