This page is focused on Nuxt 2. Please note that it does not contain information compatible with Nuxt 3.
Development for Nuxt 2 is scheduled to end. It is not recommended to use it for new development. For details on support, please check the Nuxt 2 website.
microCMS Blog has been made open source. The content of the microCMS Blog is managed with microCMS.
In this tutorial, you will create a clone of the microCMS Blog by integrating it with your own microCMS service.
The license for the microCMS Blog is Apache License 2.0, allowing for modification, reproduction, and commercial use. After completing this tutorial, you can change the appearance and use it for commercial purposes. Please make the most of it.
We will create an API tailored for the microCMS blog. The API schema information required during creation is documented in the README on GitHub, so please refer to that for your setup.
In the microCMS blog, when searching for articles, the full-text search API of microCMS is called via Netlify Functions from the client side. You can also start Netlify Functions locally with the command below.
$ npm run functions:serve
With functions running, you can operate the search module locally as well.
Similar to the search, the draft preview also calls the microCMS draft API via Netlify Functions. You can access /draft/?id={CONTENT-ID}&draftKey={DRAFT-KEY} to preview locally while functions are running.
Additionally, after deploying to Netlify, you can set it up in the microCMS management screen under "API Settings > Preview" as shown below, allowing you to view the draft preview from the preview button in the management screen. * Replace the example.com part with your own deployment domain.
For more information on previews, please refer to this article.
Let's deploy to Netlify. It's a convenient service that builds and deploys just by registering an account and linking your GitHub repository. It also has a webhook feature, allowing you to trigger builds and deployments when you publish content from the microCMS management screen.
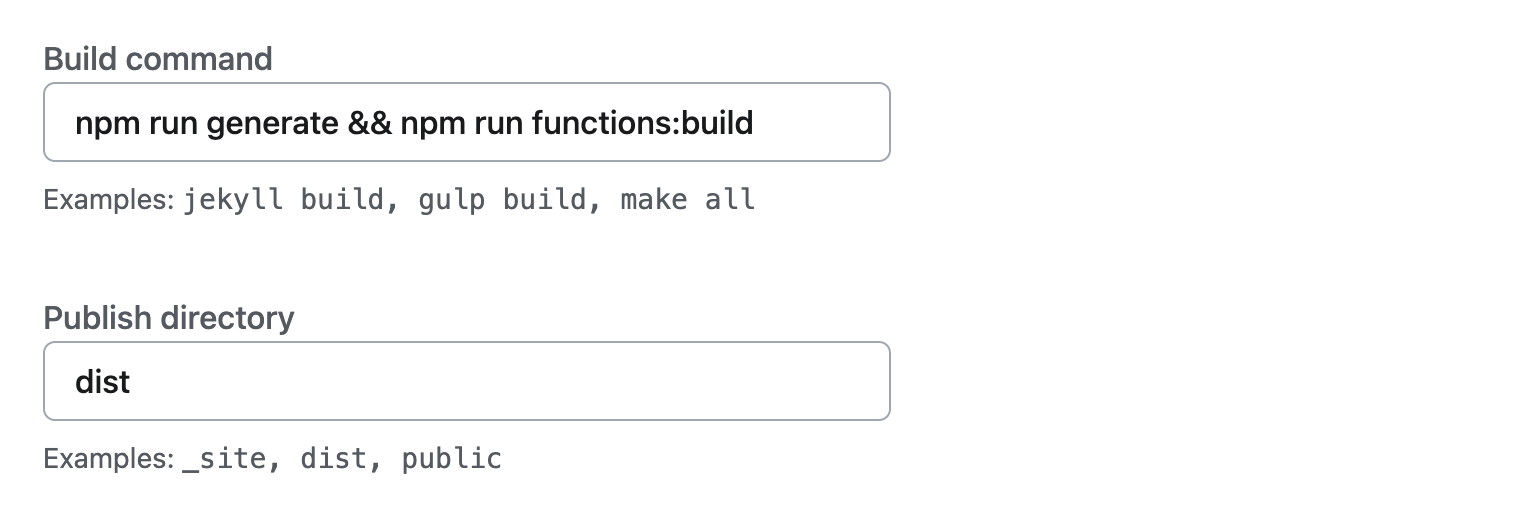
Set the build command during integration as follows.
By setting this command, you can start Nuxt's SSG and Netlify Functions.
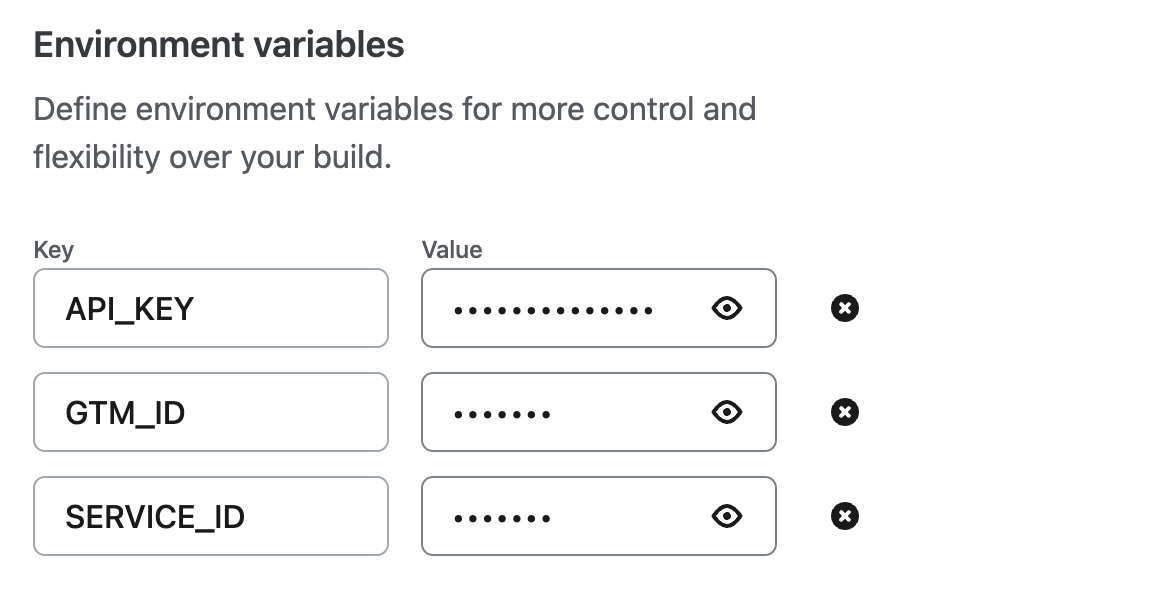
Next, by clicking the "Add environment variables" button, you can configure detailed settings, so set the environment variables here. (.env will not be pushed to GitHub, so Netlify cannot know the contents of the environment variables. Therefore, settings on the Netlify side are also necessary.)
Once you have completed the settings, click the "Deploy microcms-blog" button to actually deploy it. If the deployment is successful, you are good to go.
If you skipped the above settings, you can change them anytime in "Site configuration > Environment variables".
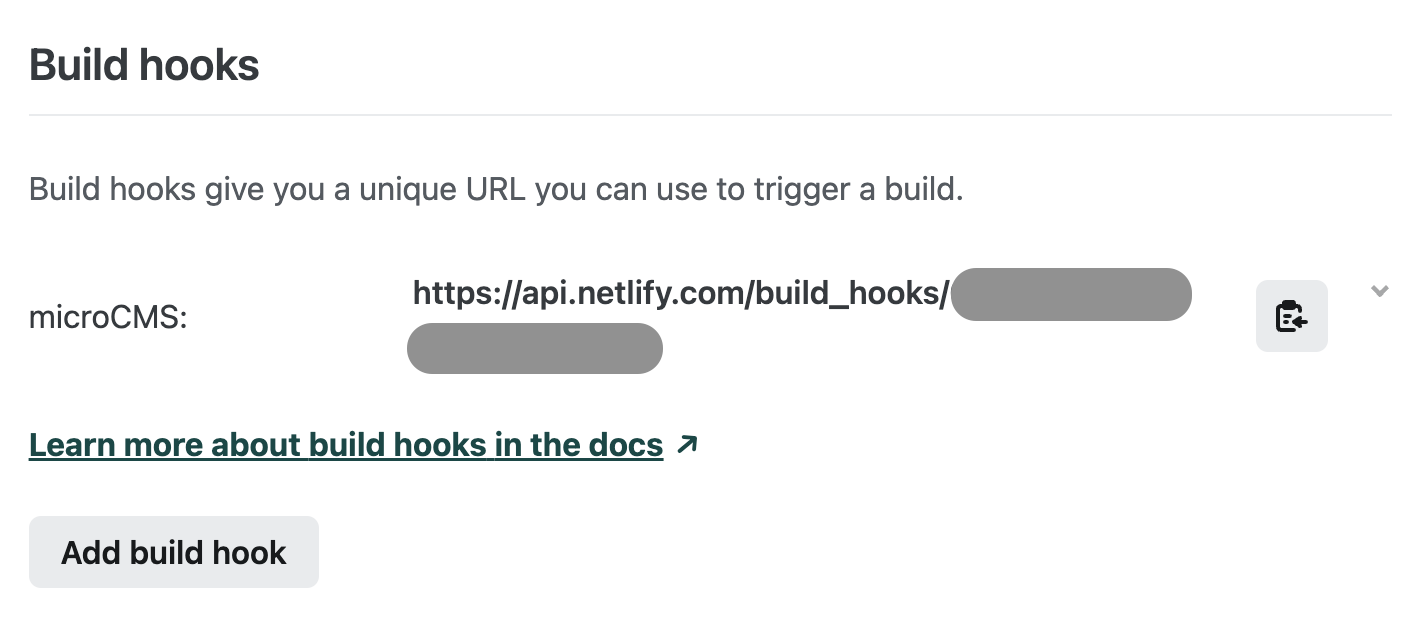
Currently, builds and deployments will not occur unless you push to GitHub. Therefore, we will configure it to automatically trigger builds and deployments on Netlify every time an article is published. First, create a webhook in Netlify under "Site configuration > Build & deploy > Continuous deployment > Build hooks".
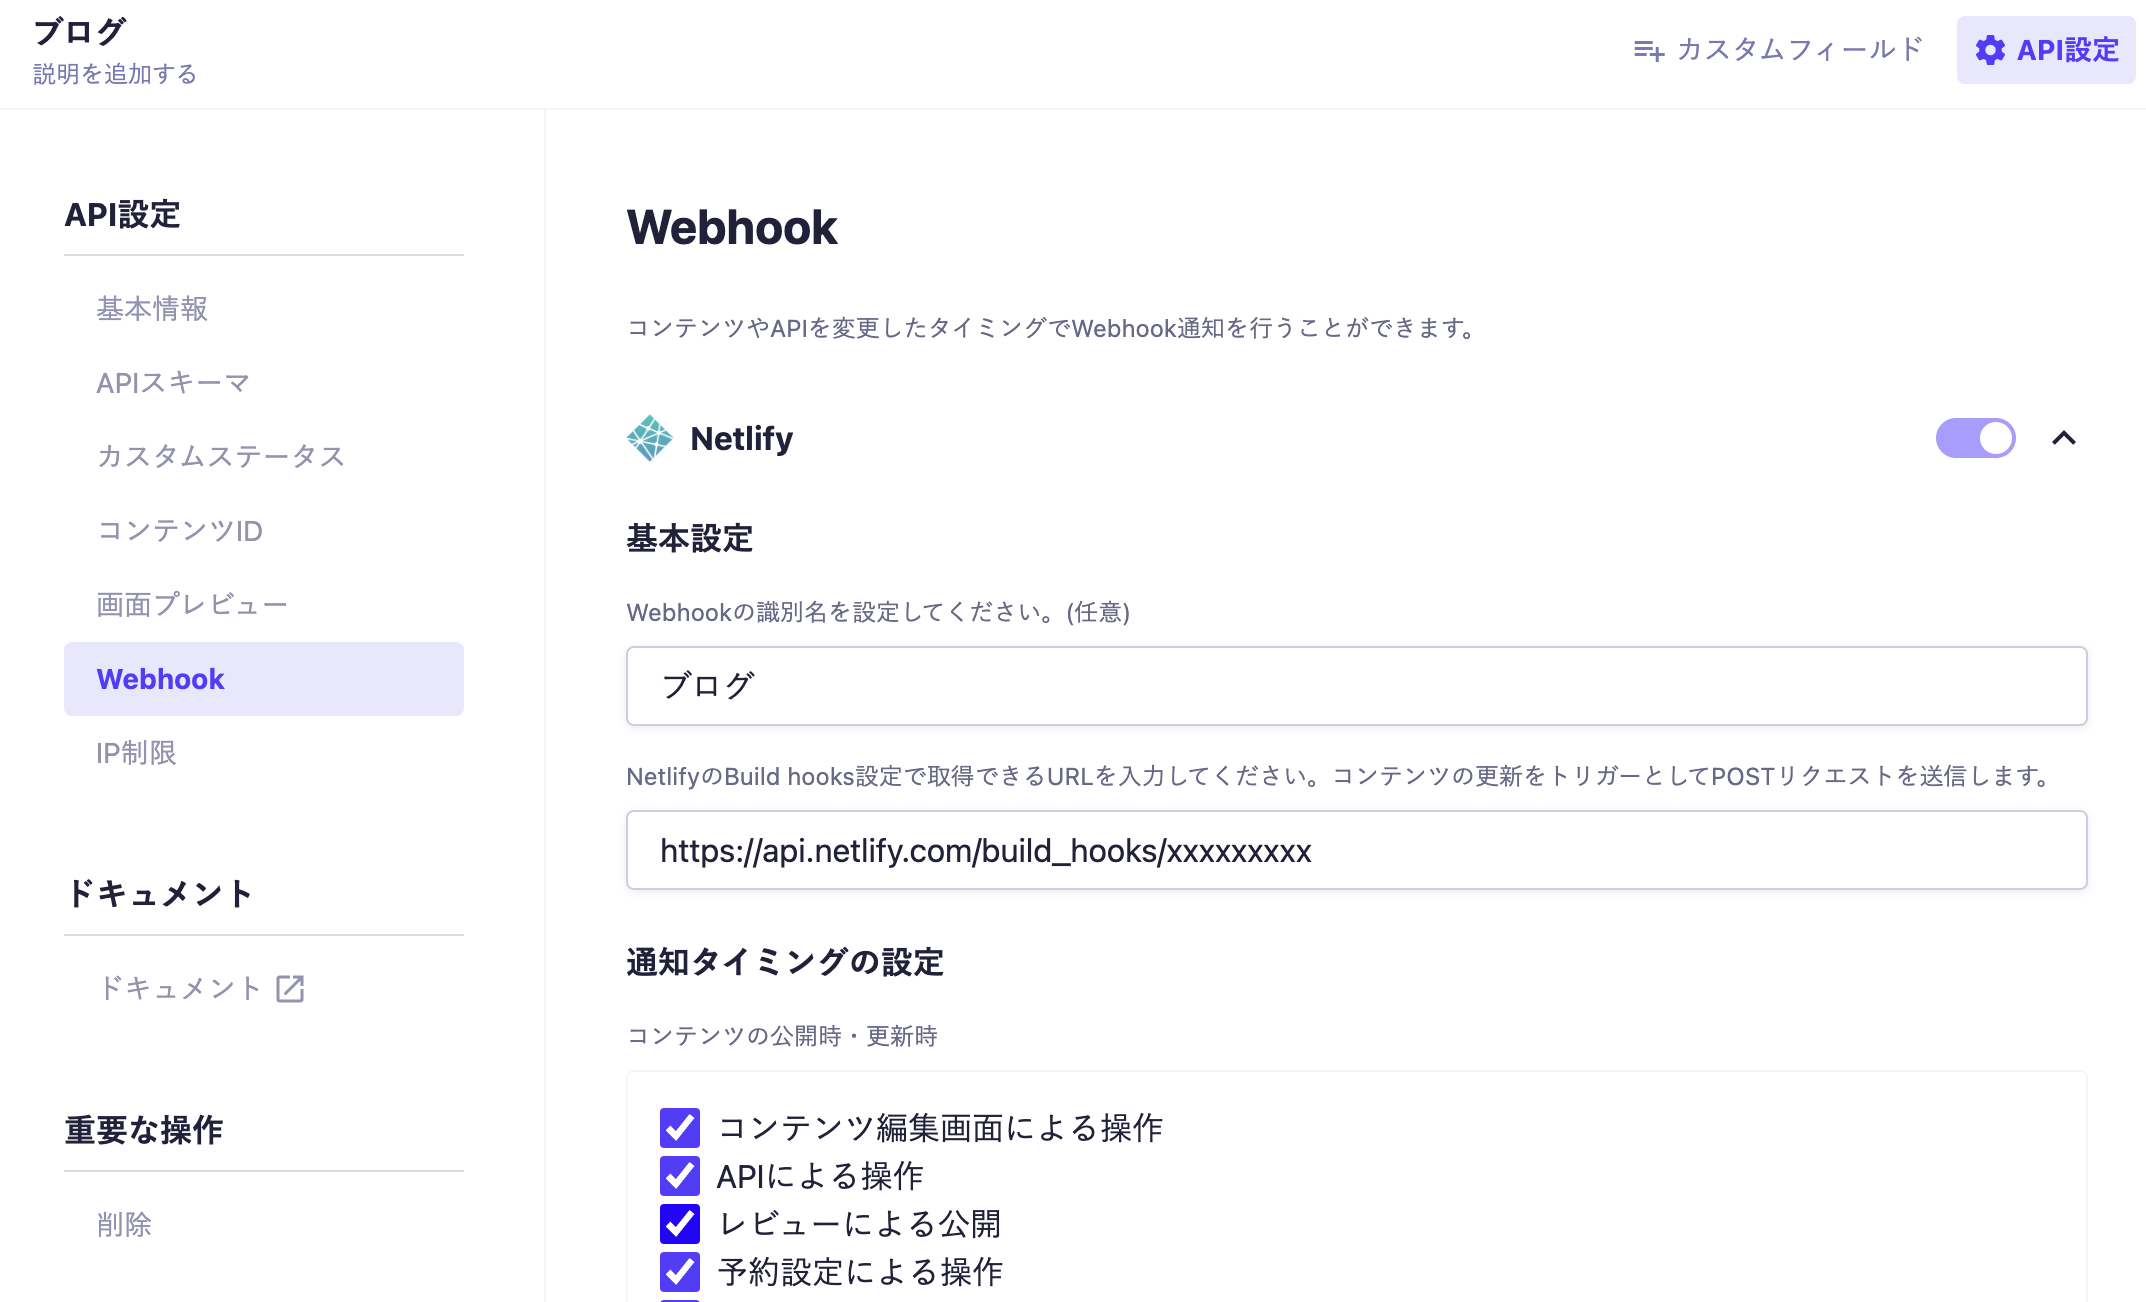
Now, in the microCMS management screen, select Netlify under "Blog > API Settings > Webhook" and set the webhook URL generated above.
With this, every time you publish or delete content in microCMS, Netlify will automatically perform builds and deployments.